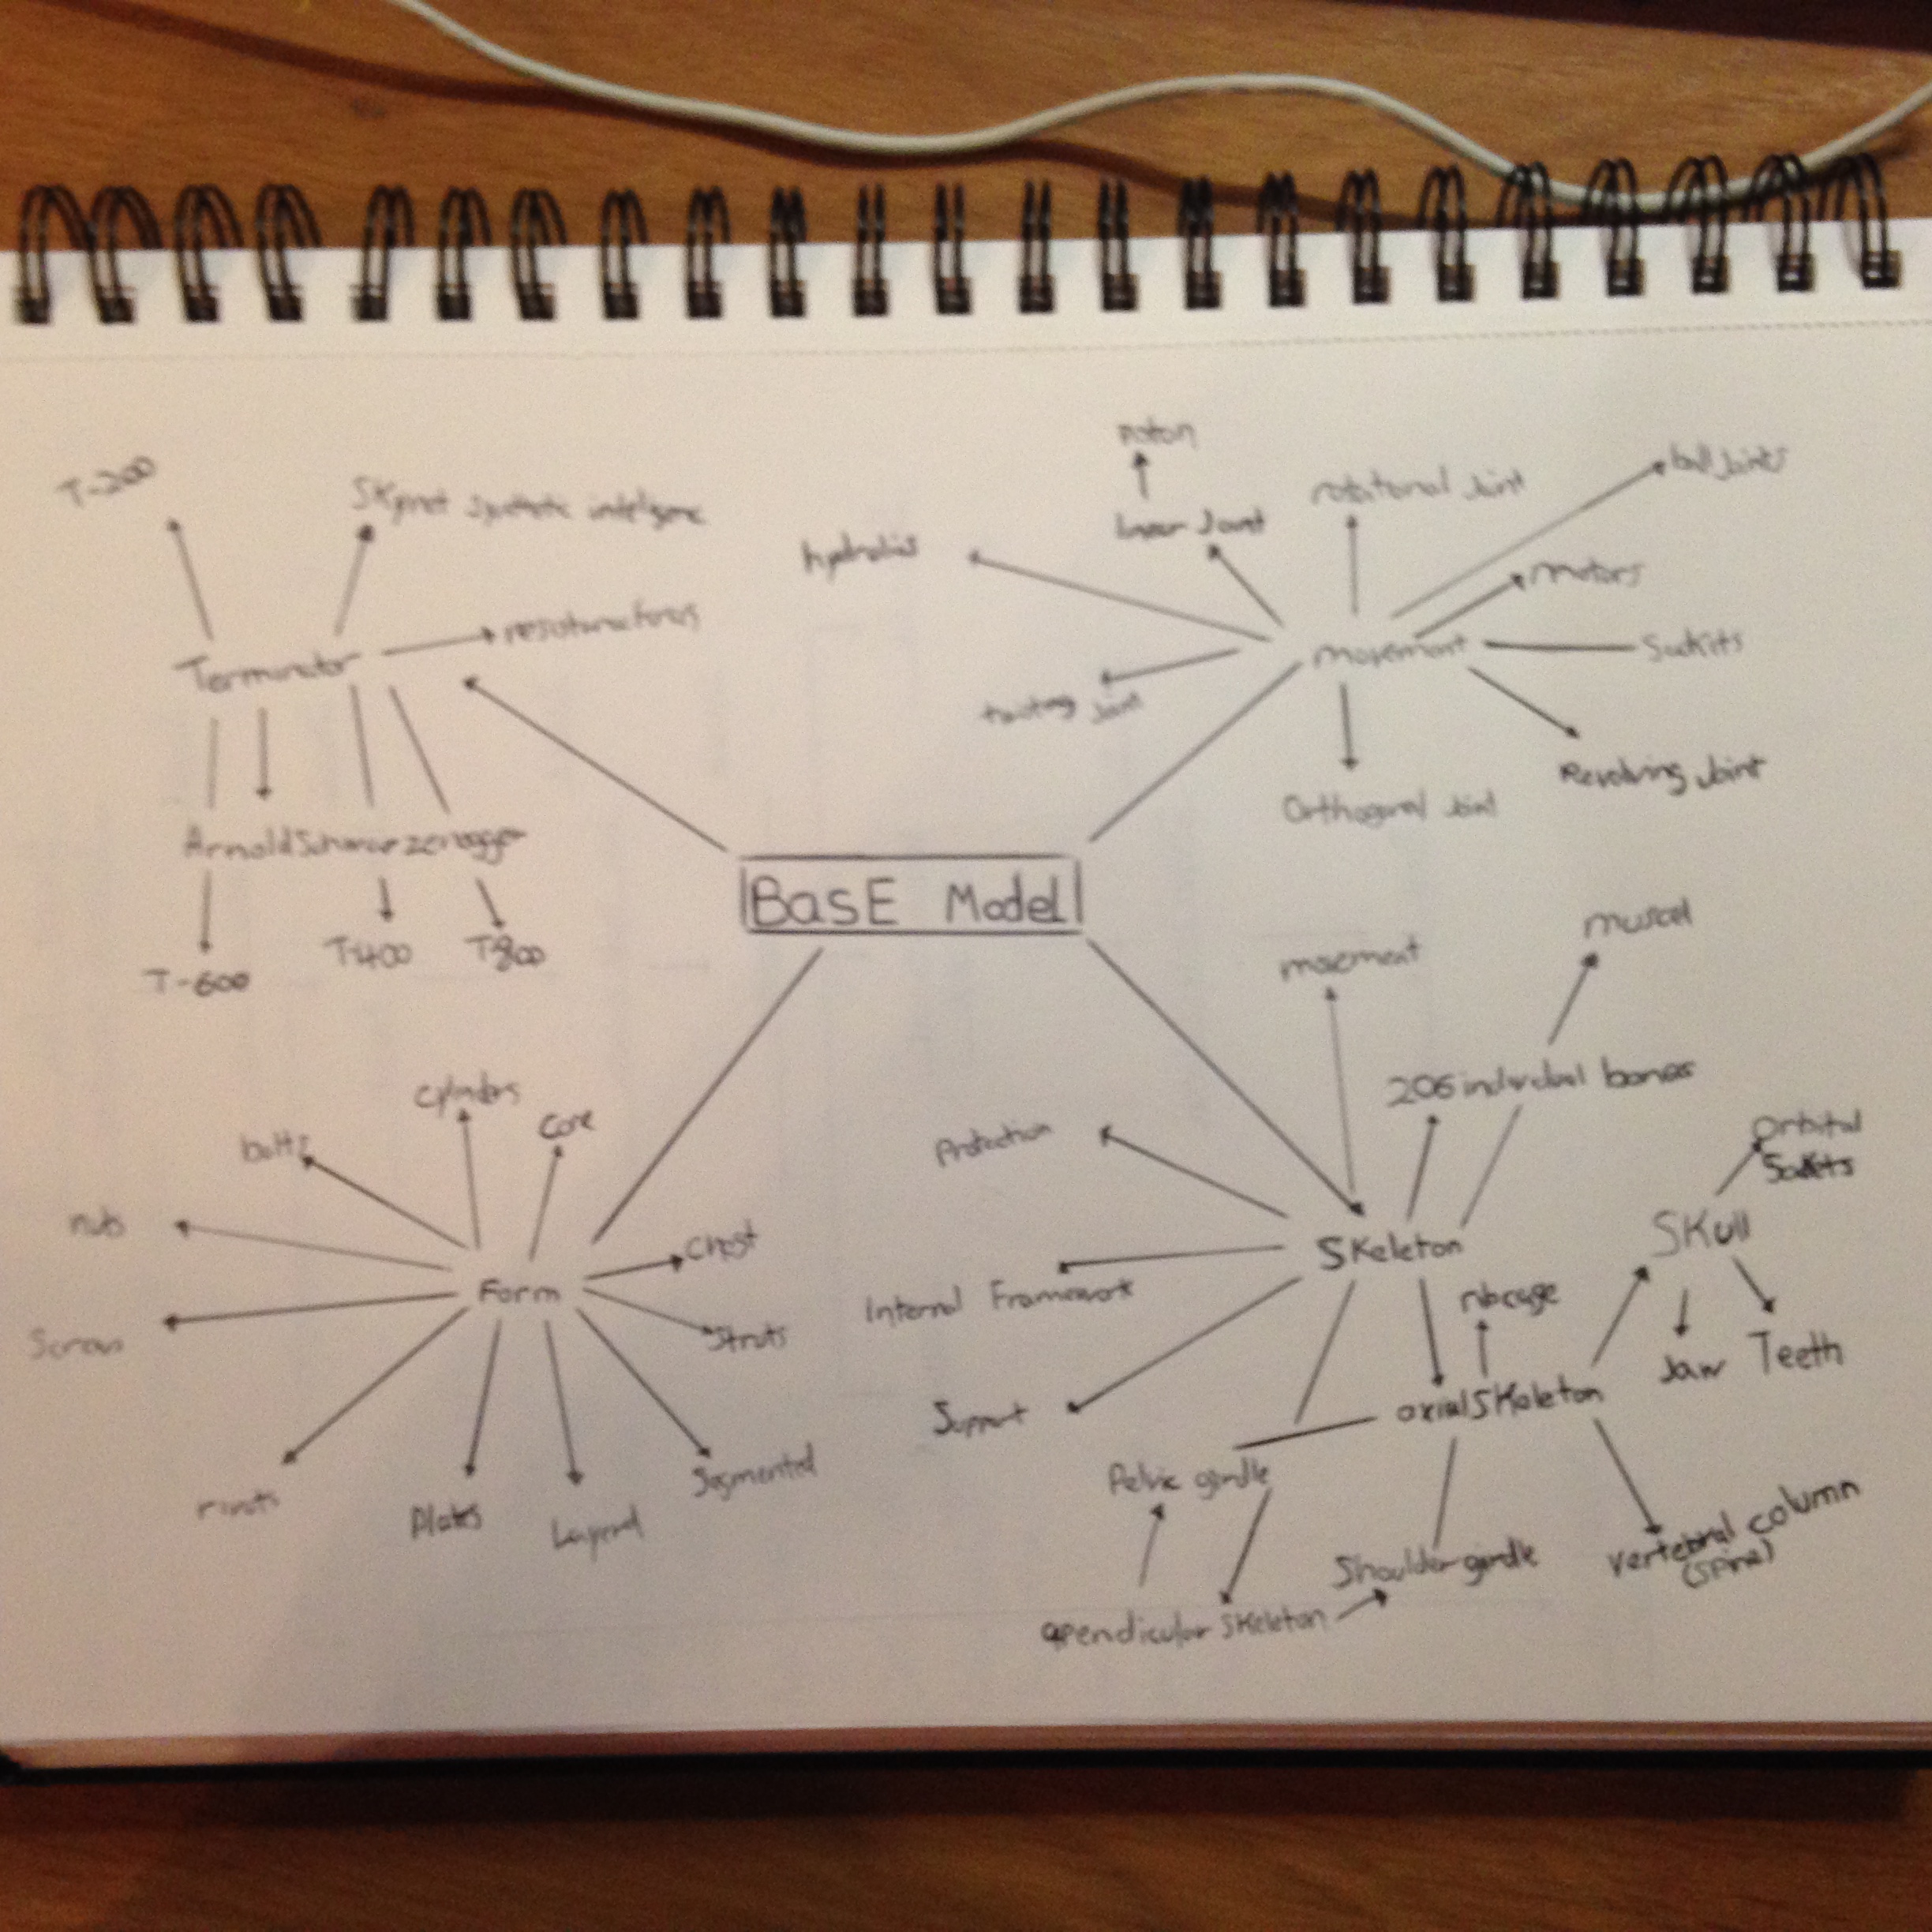
Base Model Research & Development
My initial idea’s for the base model is to create a foundation in which I can build upon in the style of my chosen theme once I have decided what theme out of Western Medieval fantasy, Steam Punk or Cyber Punk I want to progress with. I have decided that my robot is going to be a Humanoid type robot, my initial criteria for the base model is that I want it to have neutral aesthetic between my chosen themes as for my final pieces I plan to have renders of both the base and chosen theme and for the animations see the two models combine having the pieces of the themes Armour combine with the base model in a tony stark iron man esk style when he puts his iron man suite on, how all the different pieces all come together from all different directions to form around his body. I want there to be a distinct difference in aesthetic from the base model to the themes Armour to create interesting contrast between the two styles.
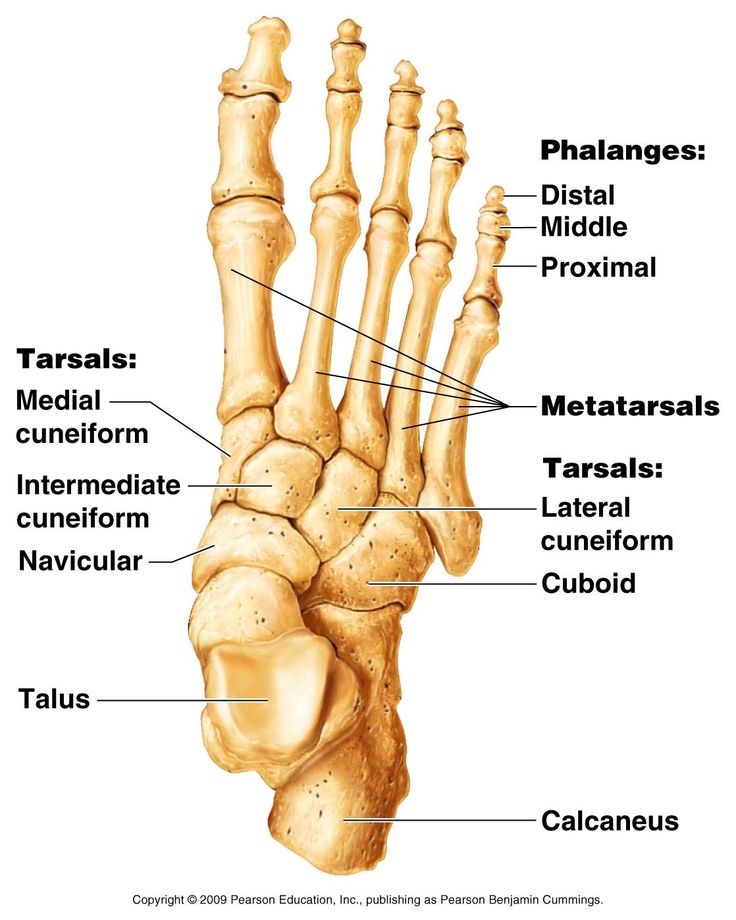
I am going to take influence and base my base model on the human anatomy specifically the skeleton of the human body in the same way that the skeleton is the base of the human body my base model will be the base for my chosen theme to give the piece some interesting similarities and contrasts between man and machine. I want to keep my base model quite simple in terms of form nothing to extreme for example extreme protrusions that when it comes to modeling my chosen themes Armour it would clash with the themes aesthetic. one major inspiration and potential research topic that initially comes to mind is the robots from the terminator series it has the same human skeleton basic design that I am trying to achieve with my own base model.
Mind Map
Mood board

Visual Analysis
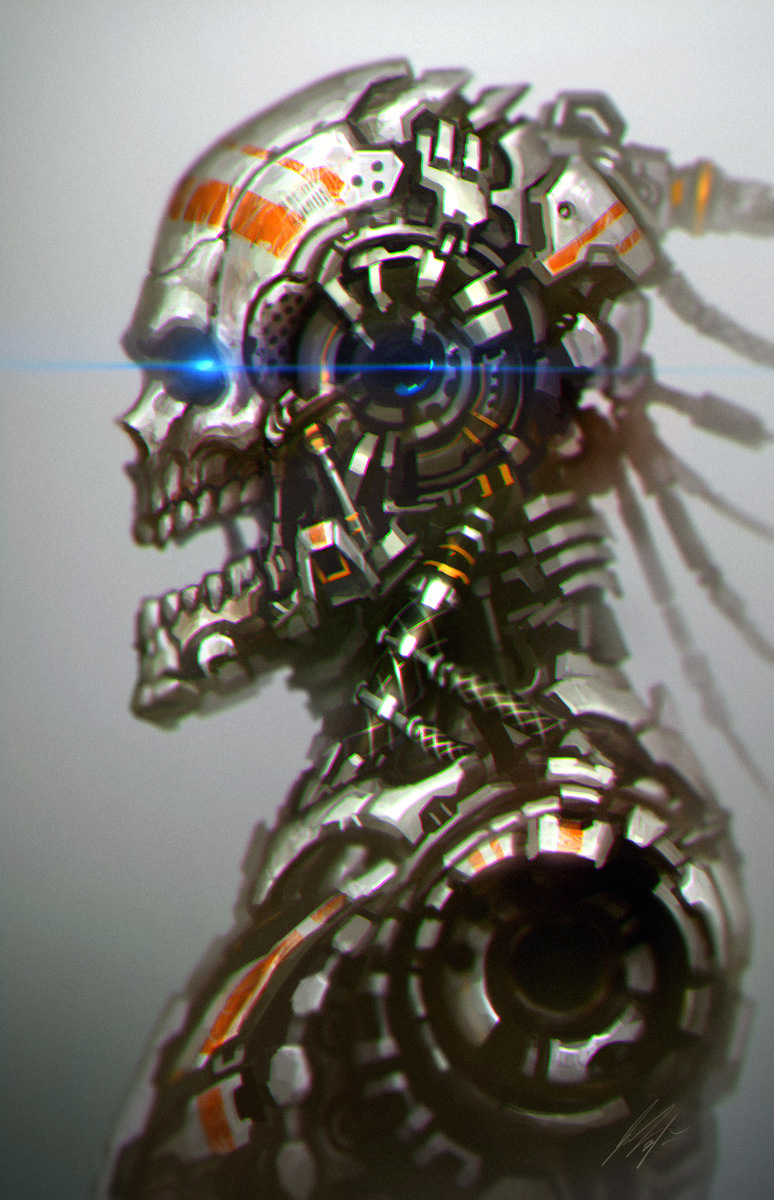
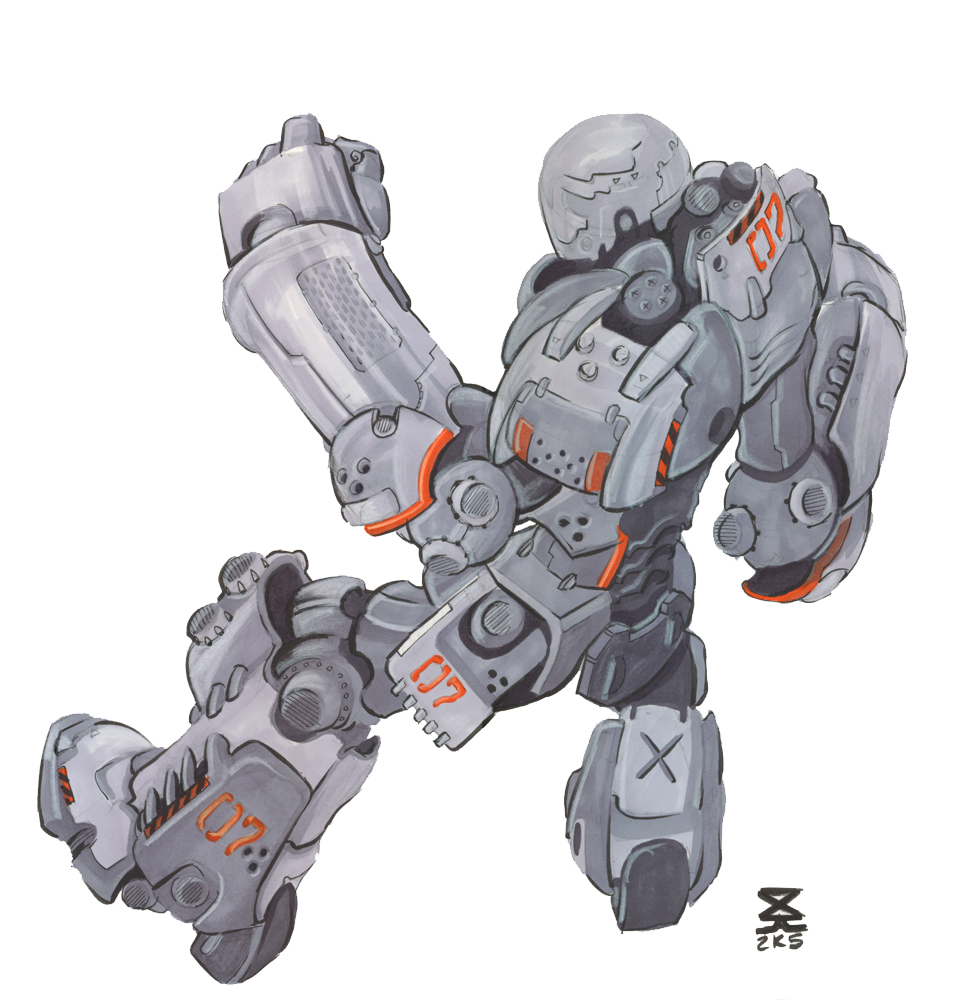
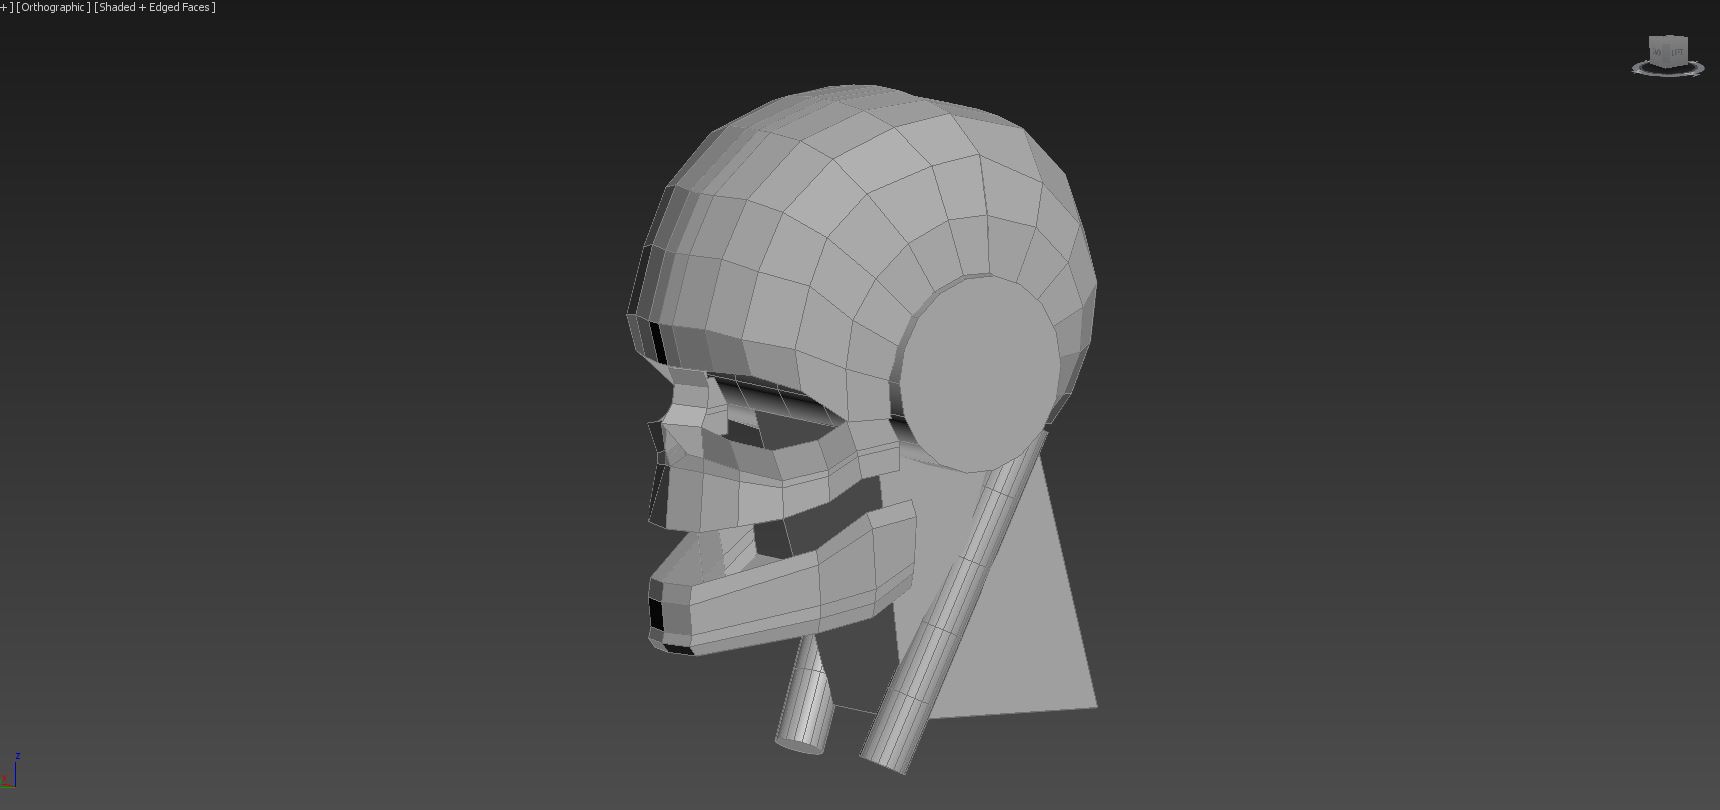
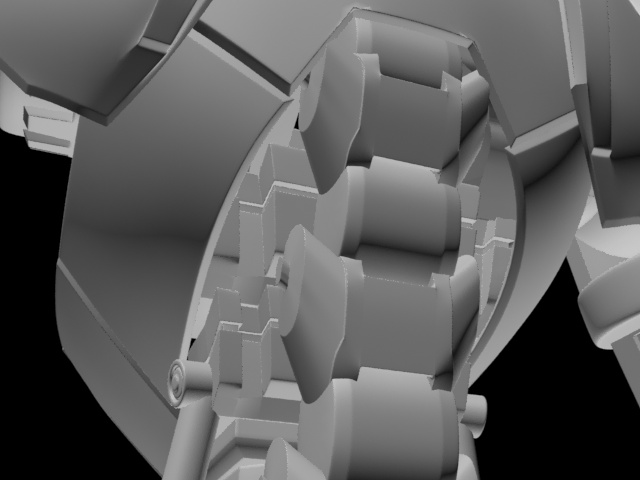
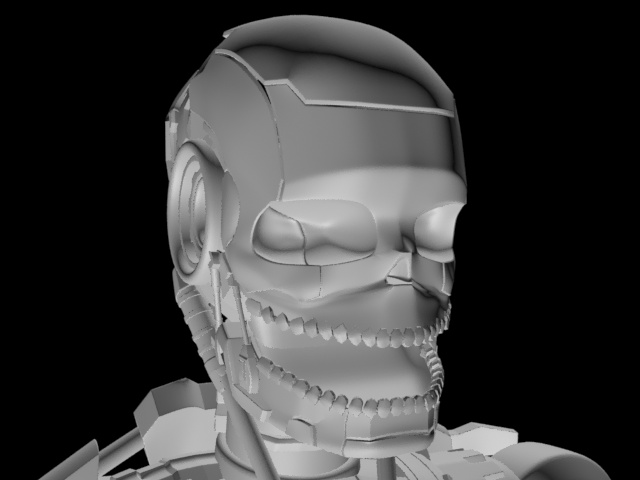
there is a lot of inspiration from this image of a robot head that I would like to incorporate into my design. particularly the use of metal plates I like how all the plates indent and slope outwards as they connect together particularly on the face plates it creates this interesting form and creates an interesting space between each plates as they connect as opposed to just to plates coming together to create a standard seam this style of plate is something im going to use in my design. also the size and shapes of plates are an interesting feature with in this image in particular the face plates as the plates are unique from each other none of them are the same size or design they differentiate quite a lot but still work together as a part of the whole design and don’t look out-of-place or out of style of the over all design of the robot. I like the robots use of pistons within its design on its jaw as a way to open and close the mouth I plan to use quite a lot of pistons within my design as a use of motion within my robots design. I intend to design my Robot models head inspired by the human skull but I like how the design within this image where it keeps close to the form of a human skull at the front with its jaw and orbital sockets then as it goes to the back of the head it becomes more distorted and the plates at the back of the head become more spaced out and geometrically shaped. the core of the brain type of the structure in the center of the skull is interesting it works well to breaks apart the design from the outer plates and differentiates itself as some of the internal inner workings of the robot this is also some thing I would like to incorporate into my design. the images colour scheme works well I like the use of lighter and darker grays with its orange accent colours it is something to think about when it comes to textureing my model as the model will be high poly I don’t have skills yet to properly uv unwrap a model that complex so i intend to use the default textures within Nvidia mental ray so simple colour themes such as the one use in this image is what im probably going to use.

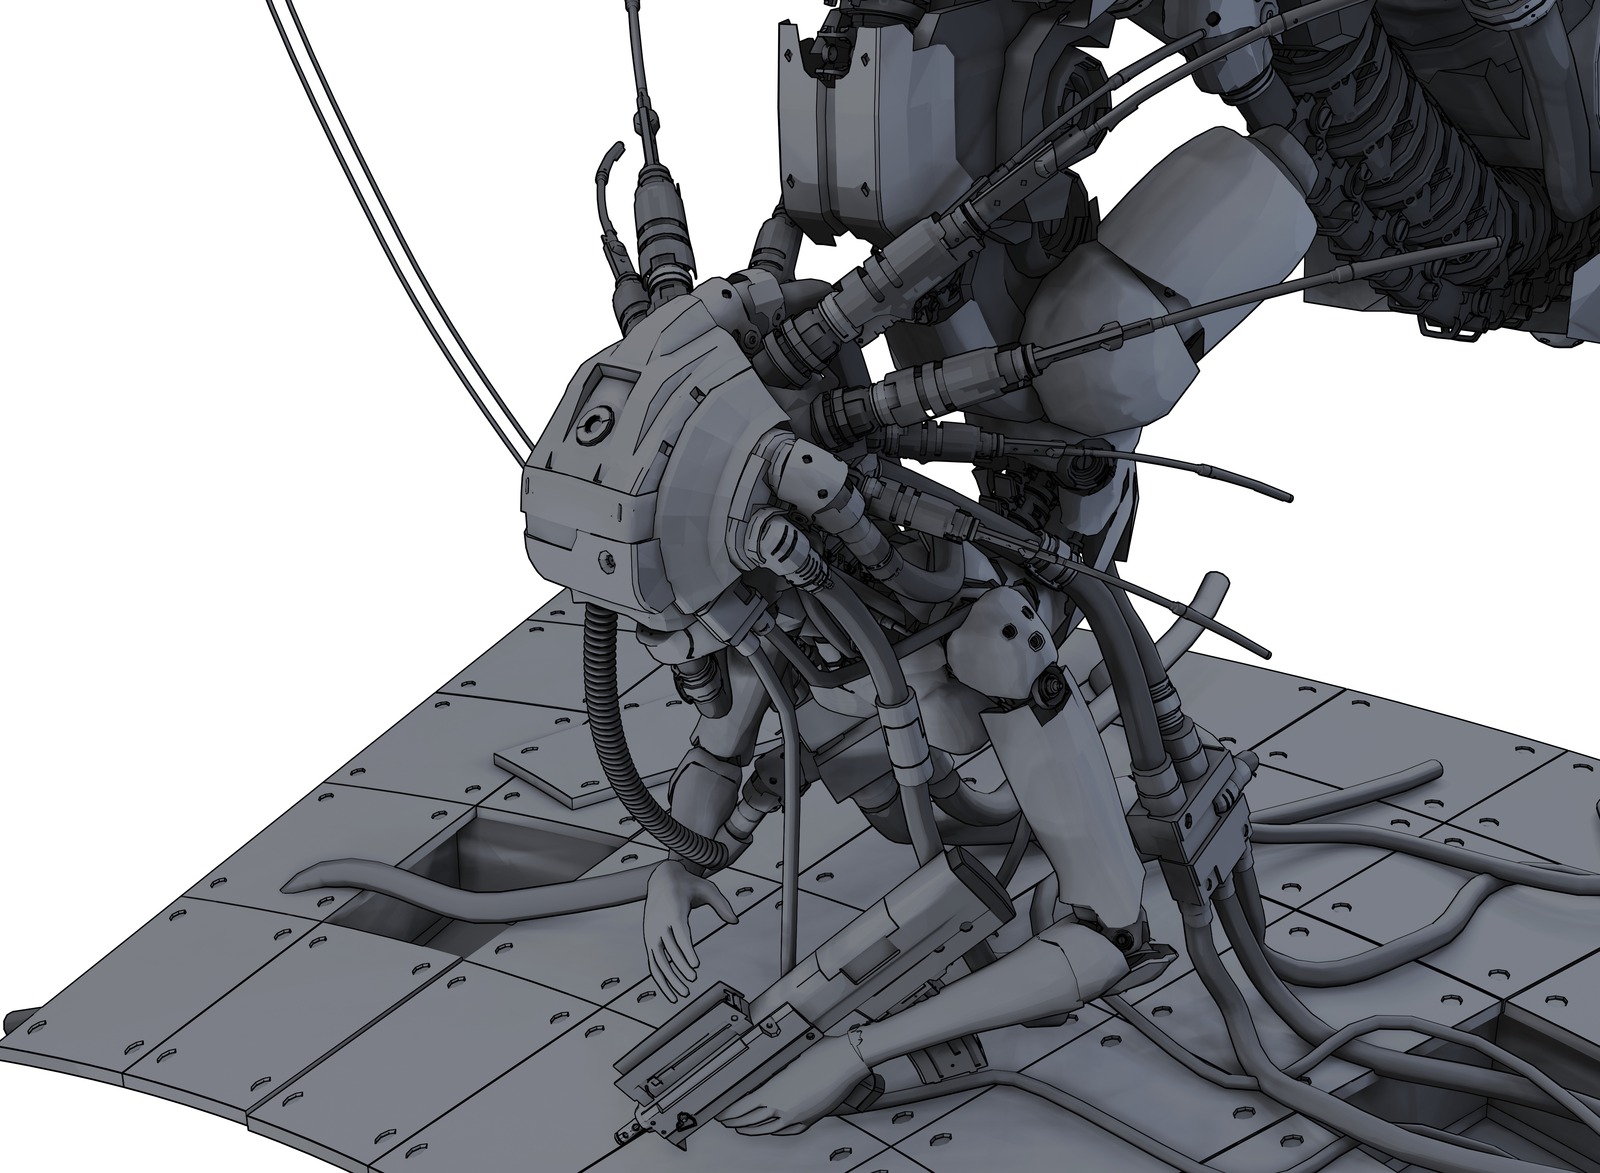
A quick test model of the type of panel style i want to use in my design influenced by this images design
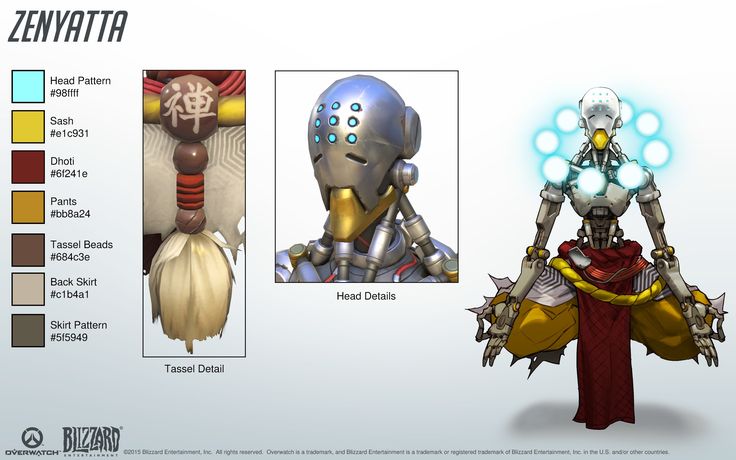
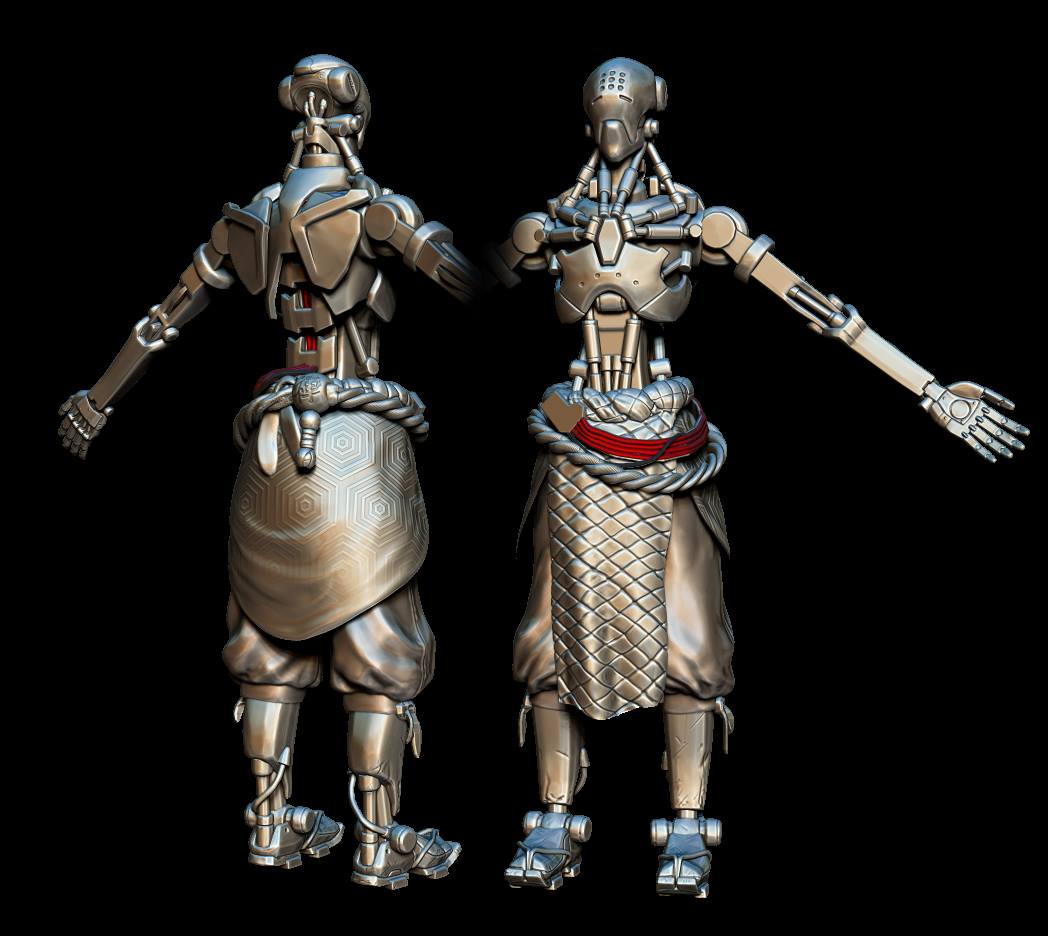
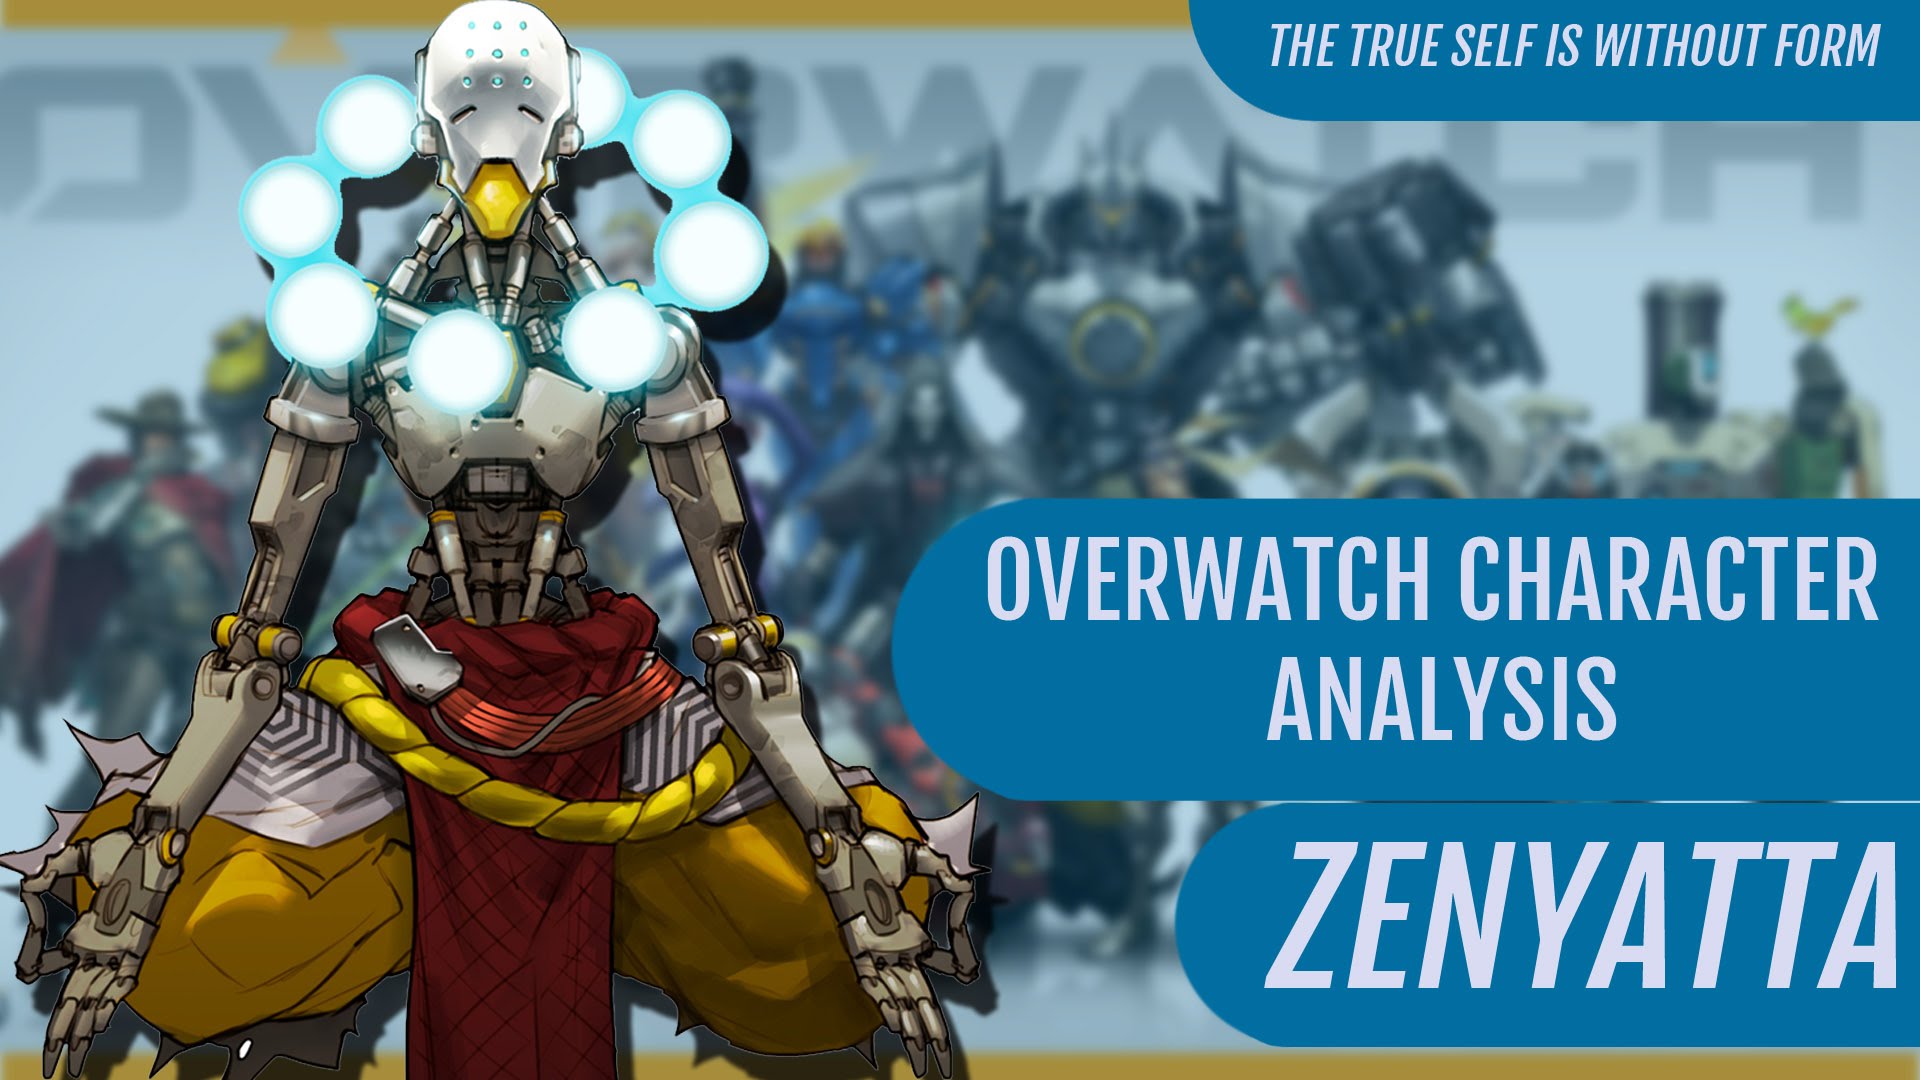
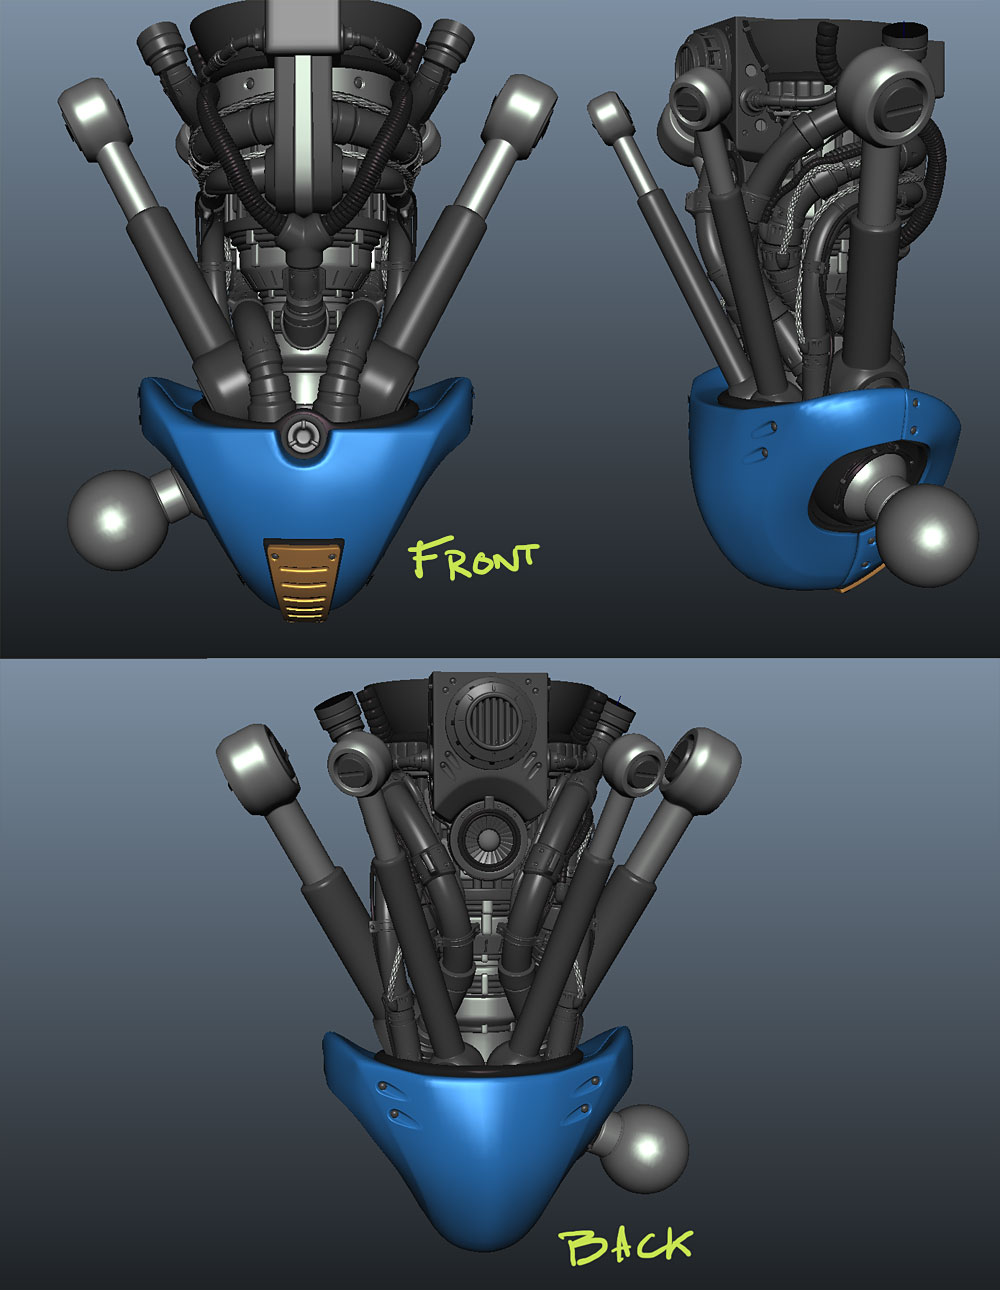
This is a fan made model of Zenyyeta from blizzards new game Overwatch it is pretty accurate to the official in game model. I particularly like this model design as it is similar to the kind of aesthetic im trying to achieve it has a human skeletal aesthetic with its big chest in compared to the rest of the model like the rib cage on a human, it is simplistic design but not so simple that it is boring there are a lot of complex shapes and a good use of symmetry within the design. I particularly like the Shoulder plates on the back of the model and would like to incorporate it into my own design as they resemble the shoulder blades on a human skeleton. one thing I have noticed when researching and looking for robots that fit the aesthetic im trying achieve is that the main parts of design that are similar to the human skeleton is the chest and back area it tends to be enlarged when compared to the rest of the design similar the ribcage, the head has the most similarity as most of the designs are clearly influenced by the human skull most of them have a skull and jaw type design. the abdomen is substantially smaller than the chest as on the human skeleton the only thing filling the space between the chest and pelvis is the spinal coloumn. most of the detail and unique features of these types of similar design tend to occur in the chest and head whilst the limbs tend to be quite plain in terms of design. which makes sense as the arms and legs of a human skeleton are not made of a lot of bones so there isnt much to take influence from in terms of design but what I found is that the proportions and size are definitely directly influence by the limbs as they tend to be a lot smaller in circumference like the bones of a human skeleton. the Design of zenyetta definitely fits the profile of similarities I have found when researching for this type of aesthetic. while I do like the design of this models chest area and intend to take influence from it I dislike the upper chest area of all the pistons that connect from the center chest plate out to the arms and up to the head. I feel like it is too much there is a lot of the same shapes in a concentrated area it becomes to repetitive and this type of design would not fit my criteria for my own design as the pistons protrude too much from the joints of the arm sockets to the head it would get in the way of the future themes armour helmet and chest. all the repetition of the pistons also highlights the very simple chest shape behind it in a negative way because having the pistons at the front you would expect to maybe see some internal workings of the robot or at least some more detailed and complex shapes behind it but it is very bare and simple.
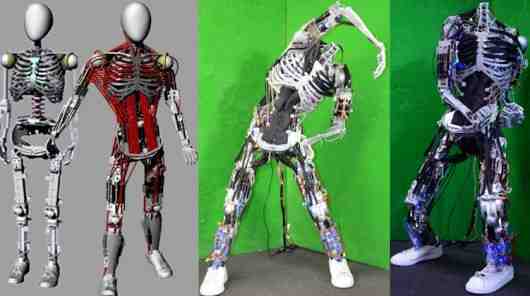
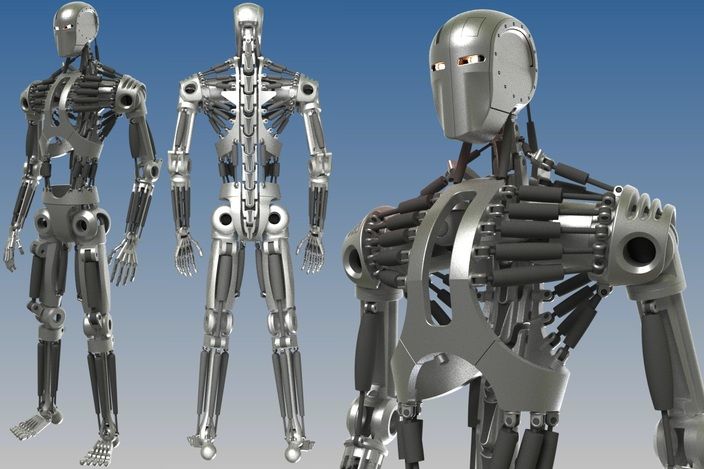
A model of the T-800 from the terminator series. This was my initial inspiration for the base model as it comes from the very successful and iconic terminator series it was the first subject that came to mind when I was thinking about what kind of aesthetic and criteria and was a base for my research. I like the very simple open design of this model it has a great use of negative space as you can see straight through most parts the model. the design looks very realistic and structurally sound and that it has a good range of movement. the use the franchises context in the design is very good and reflective of the story of Terminator as the terminator is made and designed by a AI program the simple efficient design reflects the nature that you would expect from a Ai/robot the design is fit for purpose there is no unnecessary components or decoration which leads back to the excellent use of negative space as it gives the idea that the negative space exists because there is simply no need to fill the space as the design is so simple, cost-effective and efficient. there isn’t anything specific that I want to incorporate into my design from this model but it just reinforces the design similarity I mention in my zenyetta analyst and will be used as reference of those design points
development
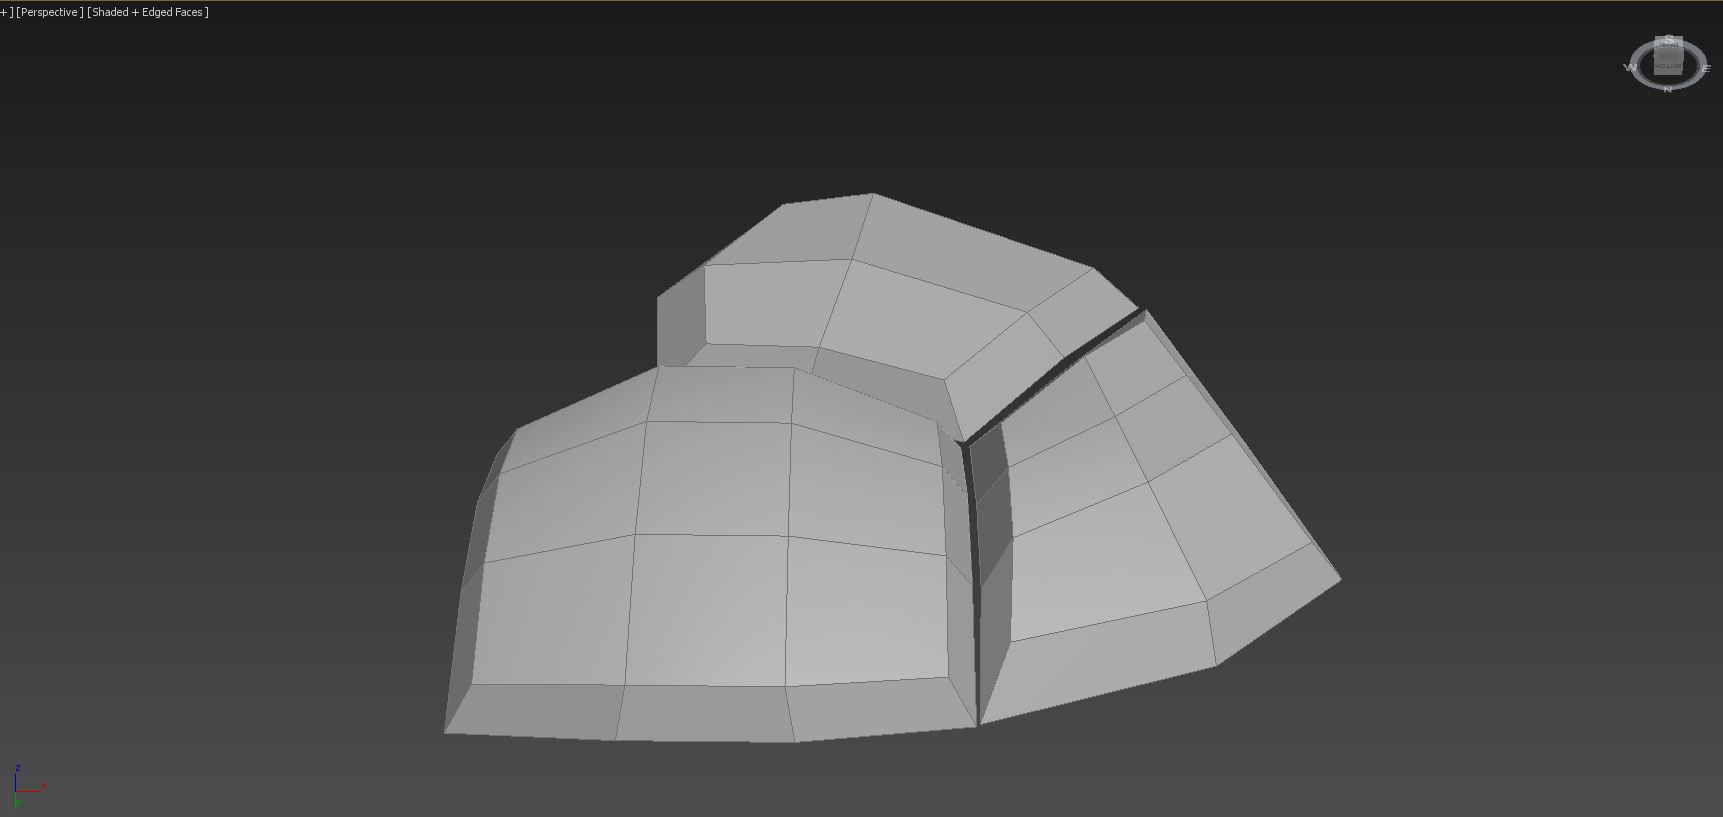
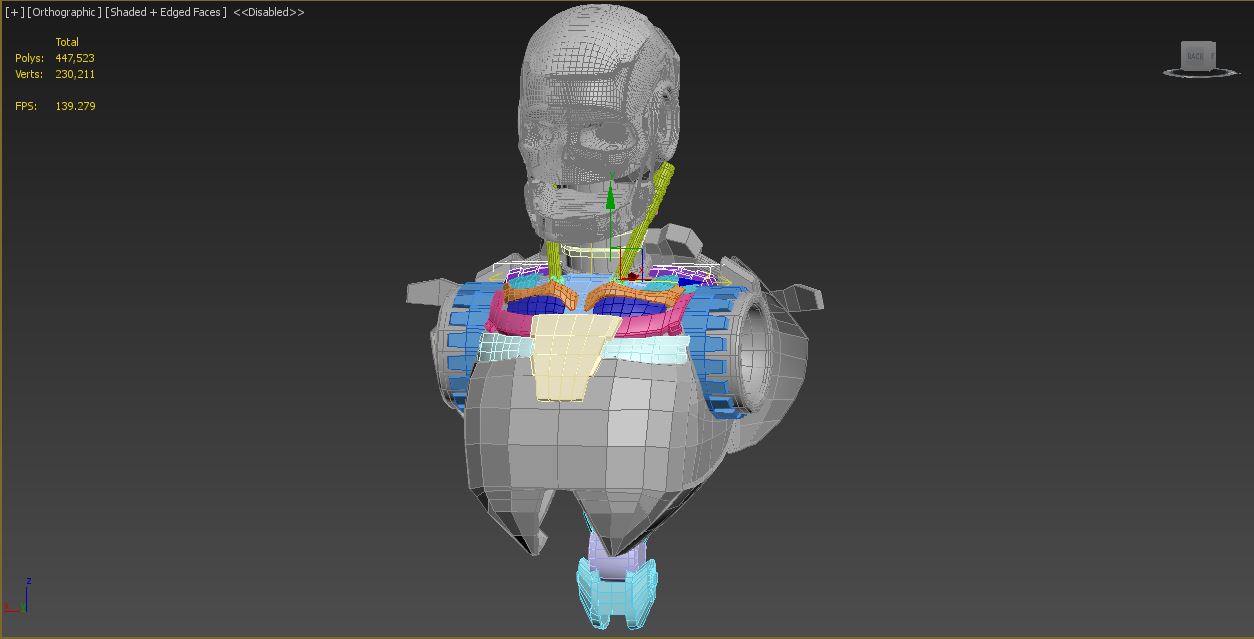
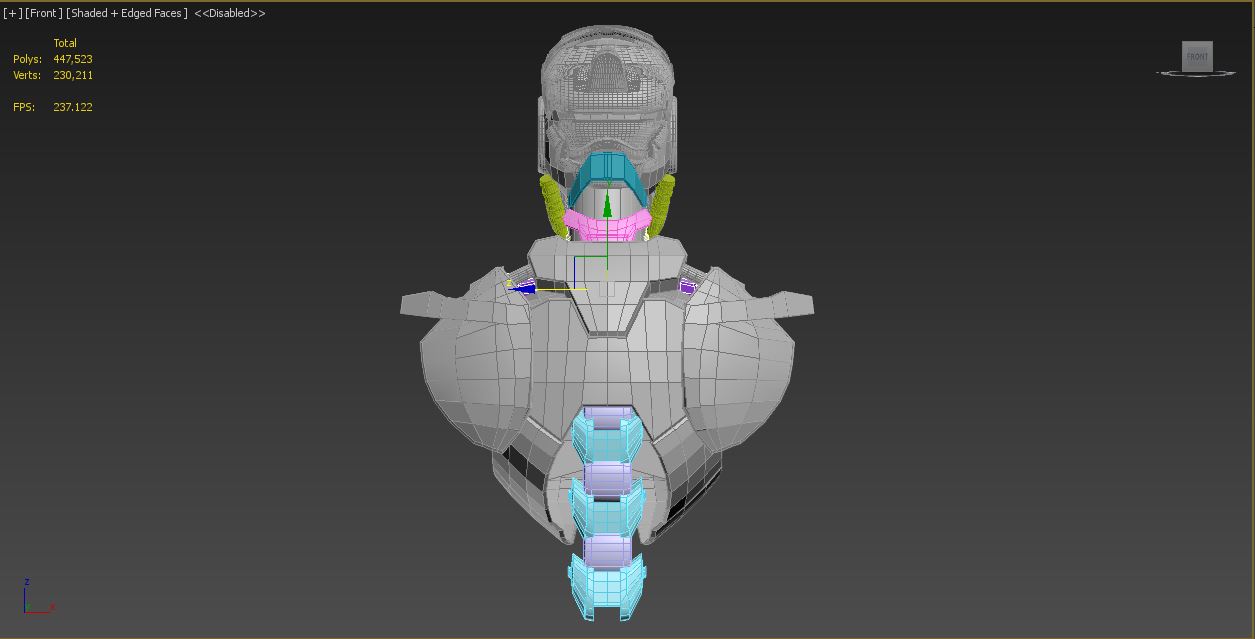
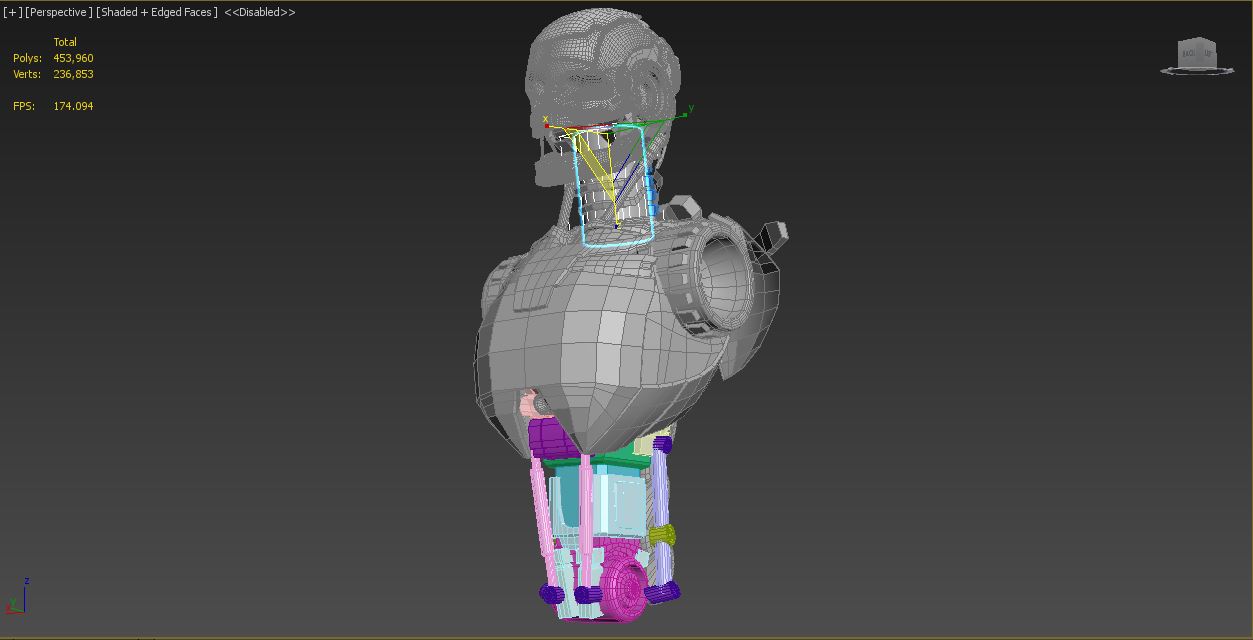
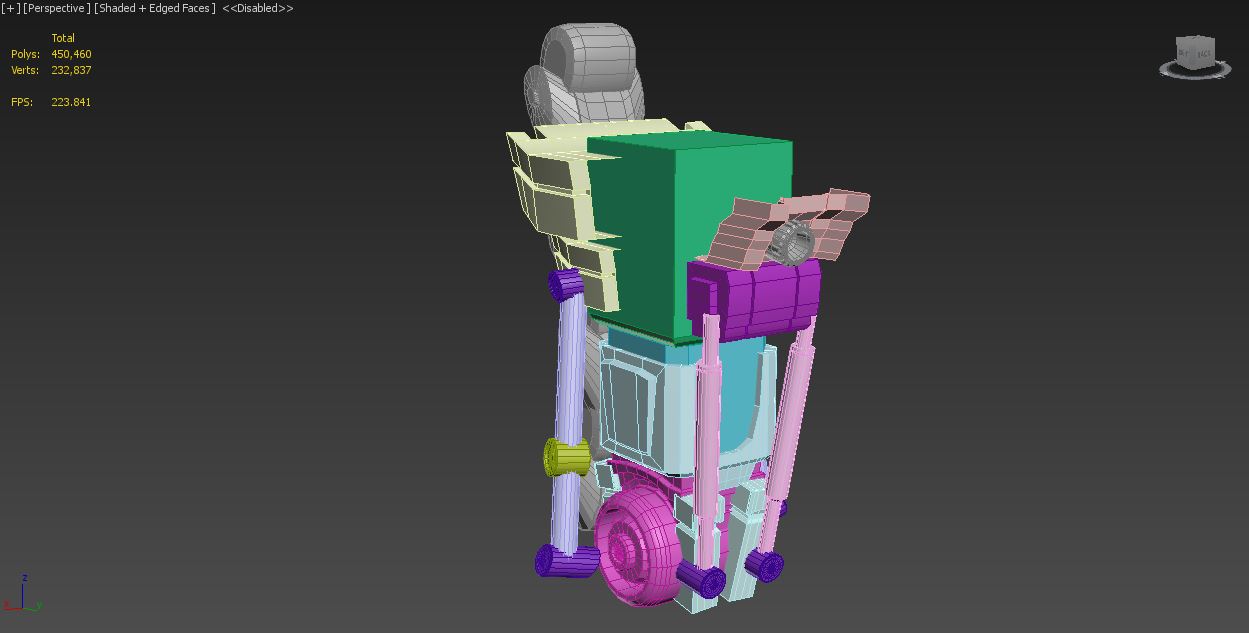
Start of production on the robot base model over a 3 week period progress is shown in the screen shots, the different colour geometry is what was made in each modeling session.
1st Session
I started from the head creating a rough guide model getting the head proportions correct. I chose to start from the head as it is the one of unique part when it comes to creating a person as it is orientated in the center of the figure and I will use the head as a reference to get the rest of the body’s proportions correct as I progress. I decided to Start modeling like this making just a rough guide instead of modeling from an orthographic drawing that we learnt from Unit 1 – Introduction To Visual Language: Orthographic Drawings Environment/Object as I feel for me an orthographic drawing is very limiting in terms of my experimentation and creativity when it comes to my design process in 3D as I find it quite hard to transfer a design from paper into 3D space which limits me with initial designs as I can’t quite visualise it in a 3D space which tends me to create more simplified designs. Over the course of this year my skills with modeling have improved immensely as I only learnt how use 3D modeling software at the start of this course I feel more comfortable and prefer to start modeling with out a type of reference such as an orthographic drawing as was the case with Unit 6 – 3D Project I started modeling a robot before even starting the brief just looking at google images for influence and reference starting with the head for reference and it worked much better then when I was first starting to 3D model using an orthographic drawing as I found that unless the orthographic drawing is extremely accurate it is hard to model as if you change the proportions to fit better within the 3D model the usefulness of the drawing becomes less and less as you change one thing the more it becomes out of proportion and less accurate to follow and then begins to hinder the process as you are still trying to follow the design that doesn’t work in the 3D space. so I decided not to create an orthographic drawing as I feel an orthographic drawing it is not a useful tool to me and would only hinder me, and as this project is rather big and ambitious it is time saved that would be better spent on production and design.
2nd Session
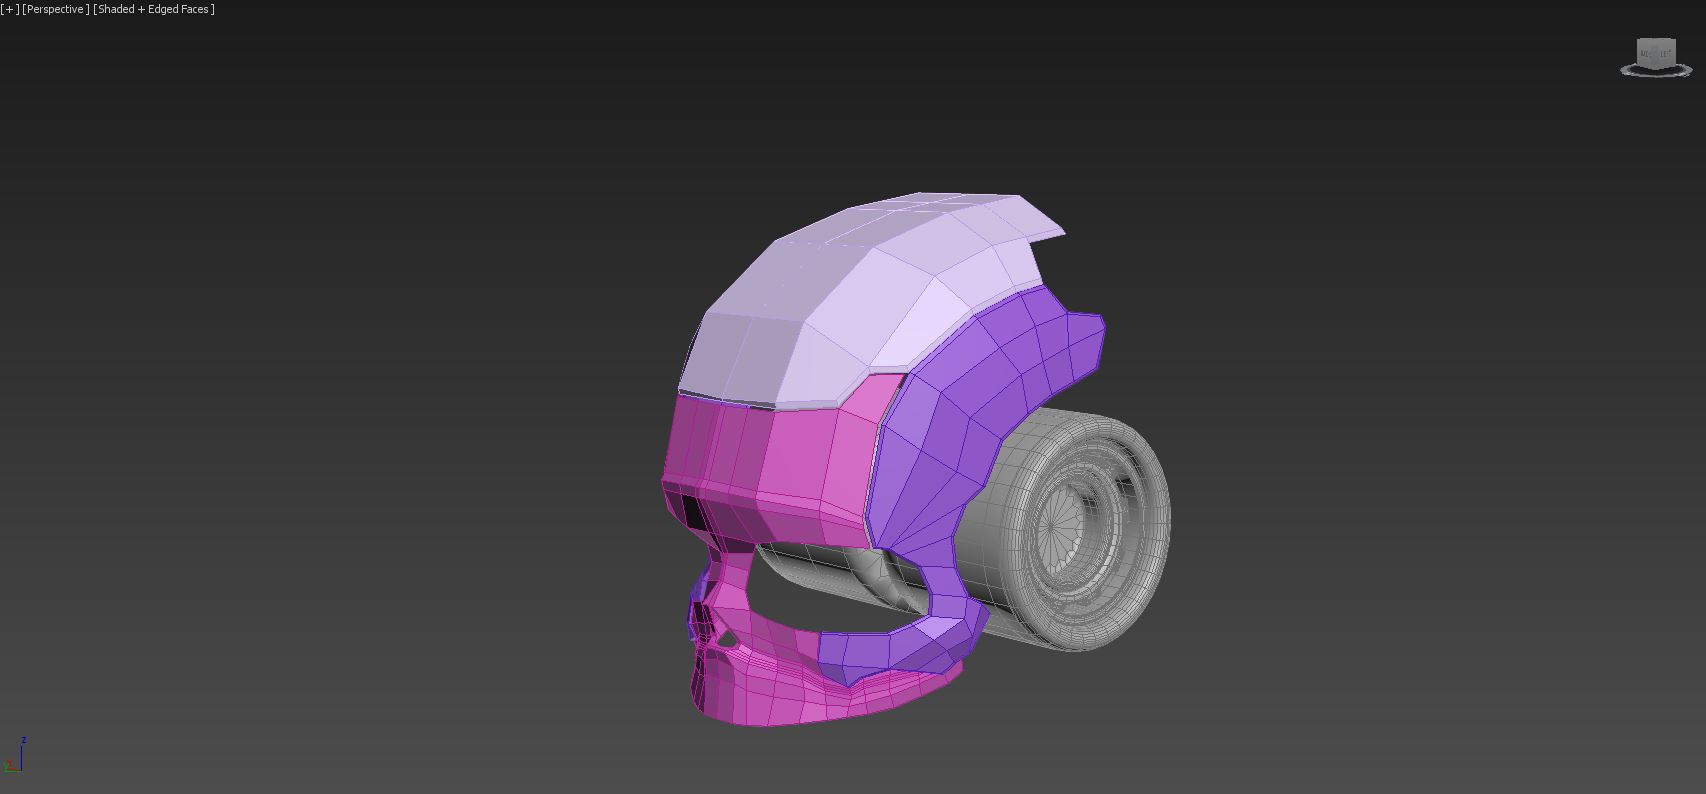
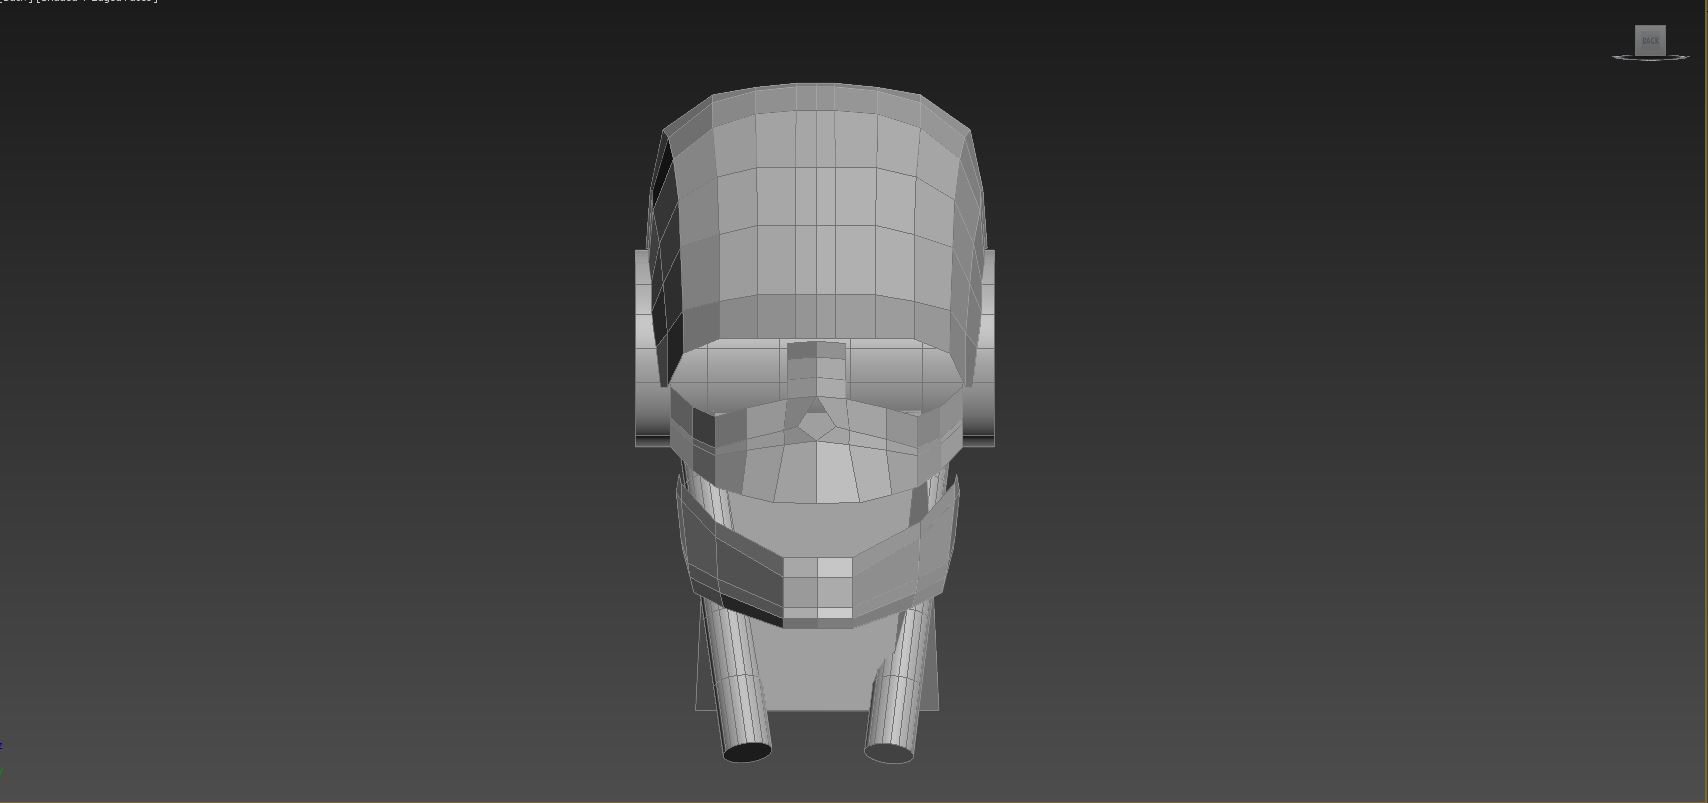
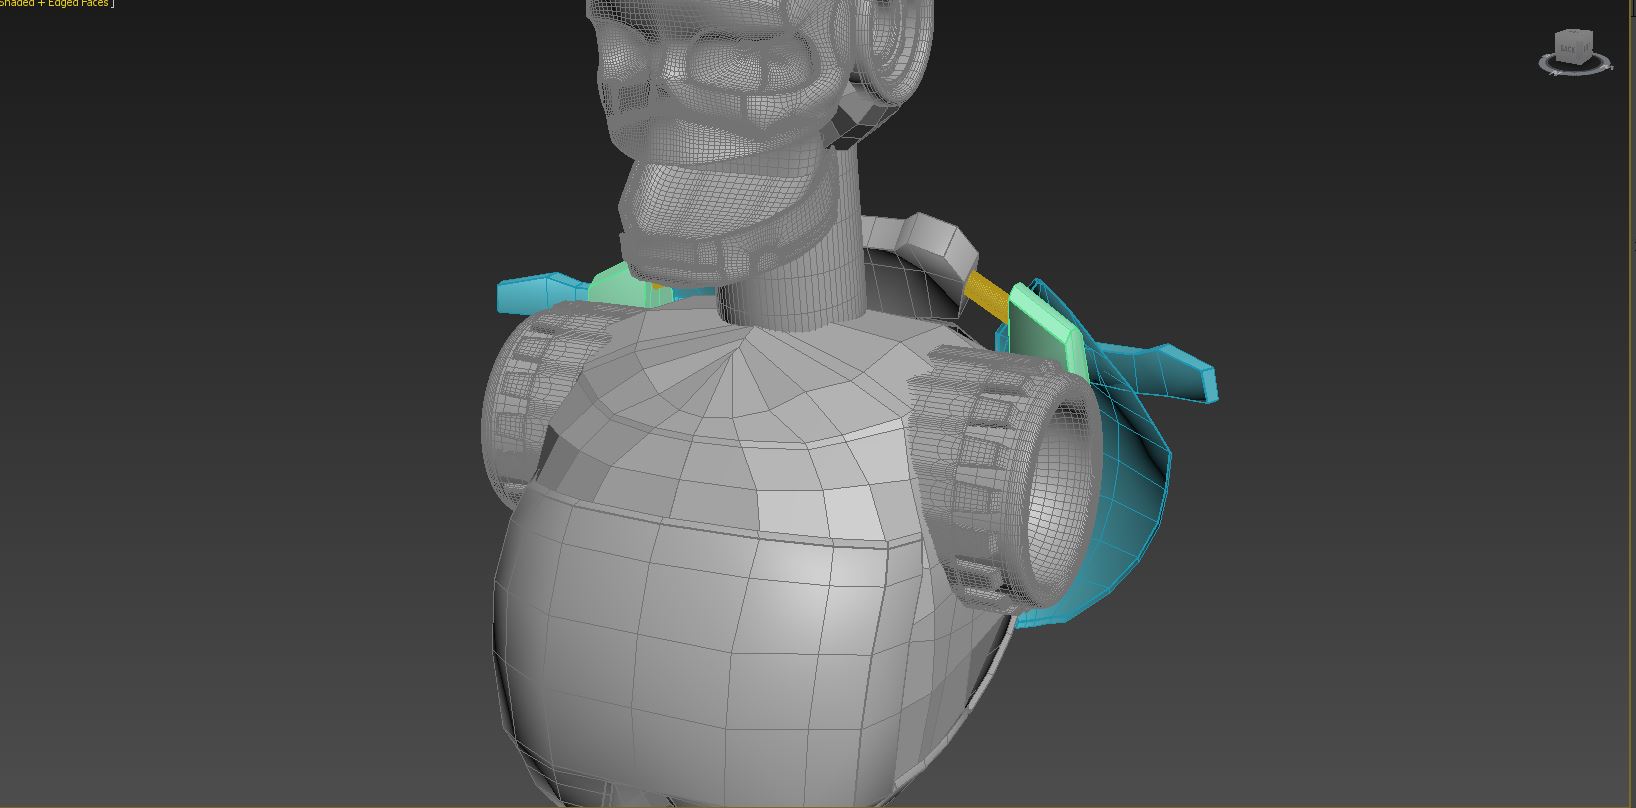
I started by creating the “brain” core like structure that runs from each side of the head as it is the sort of core of the head,. I then started to create the face plates inspired by the mech head in my research particularly in the way that individual plates are broken up into interesting unique shapes on top of the rough reference guide. one thing I dislike about it was the extra geometry on the front face plate that was created when creating the hook like shape of the nose opening I feel like I didn’t model that part as efficiently as I could as in trying to get the best shape of the nose it left me with a lot of extra geometry that isn’t needed. but I will have to see what it looks like when it is turbo smooth as the extra geometry there could cause it to be come quite rigid when turbo smoothed.
3rd Session
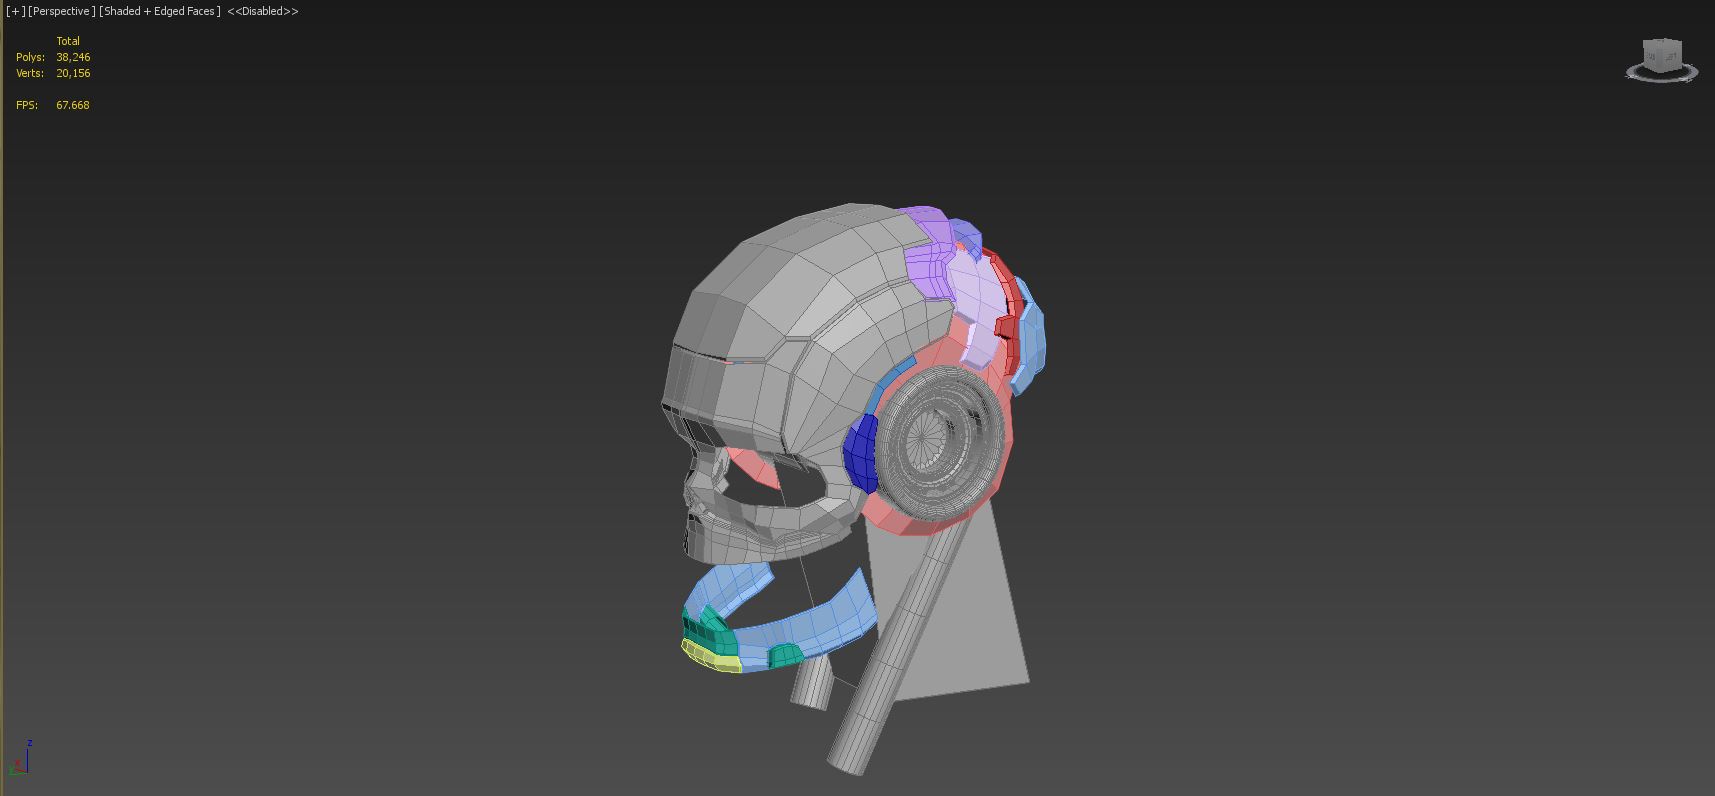
Started to add the back head plates and the jaw taking influence from the mech head as the plates towards the back become more geometric in shape transitioning from human to machine.
4th Session
I get the head to a “completed stage” finishing the back head plates and developing the jaw more at this stage I do some tests with turbo smoothing to see what the plates look like turbo smoothed together. when adding the extra geometry to the mesh to keep the straight edges I discover a different type of champfer as previously I had been using Tri champfer to give me rounder edges but that is not the effect I was wanting with these panels when experiment with the different champfer settings I found the Quad champfer which gave me the extra geometry that I wanted but still keeping the edges flat and smooth. also at this stage I realise I am taking to long / not working enough to get this model complete in my projected 2 weeks that I had initially planned for my base models production.
5th Session
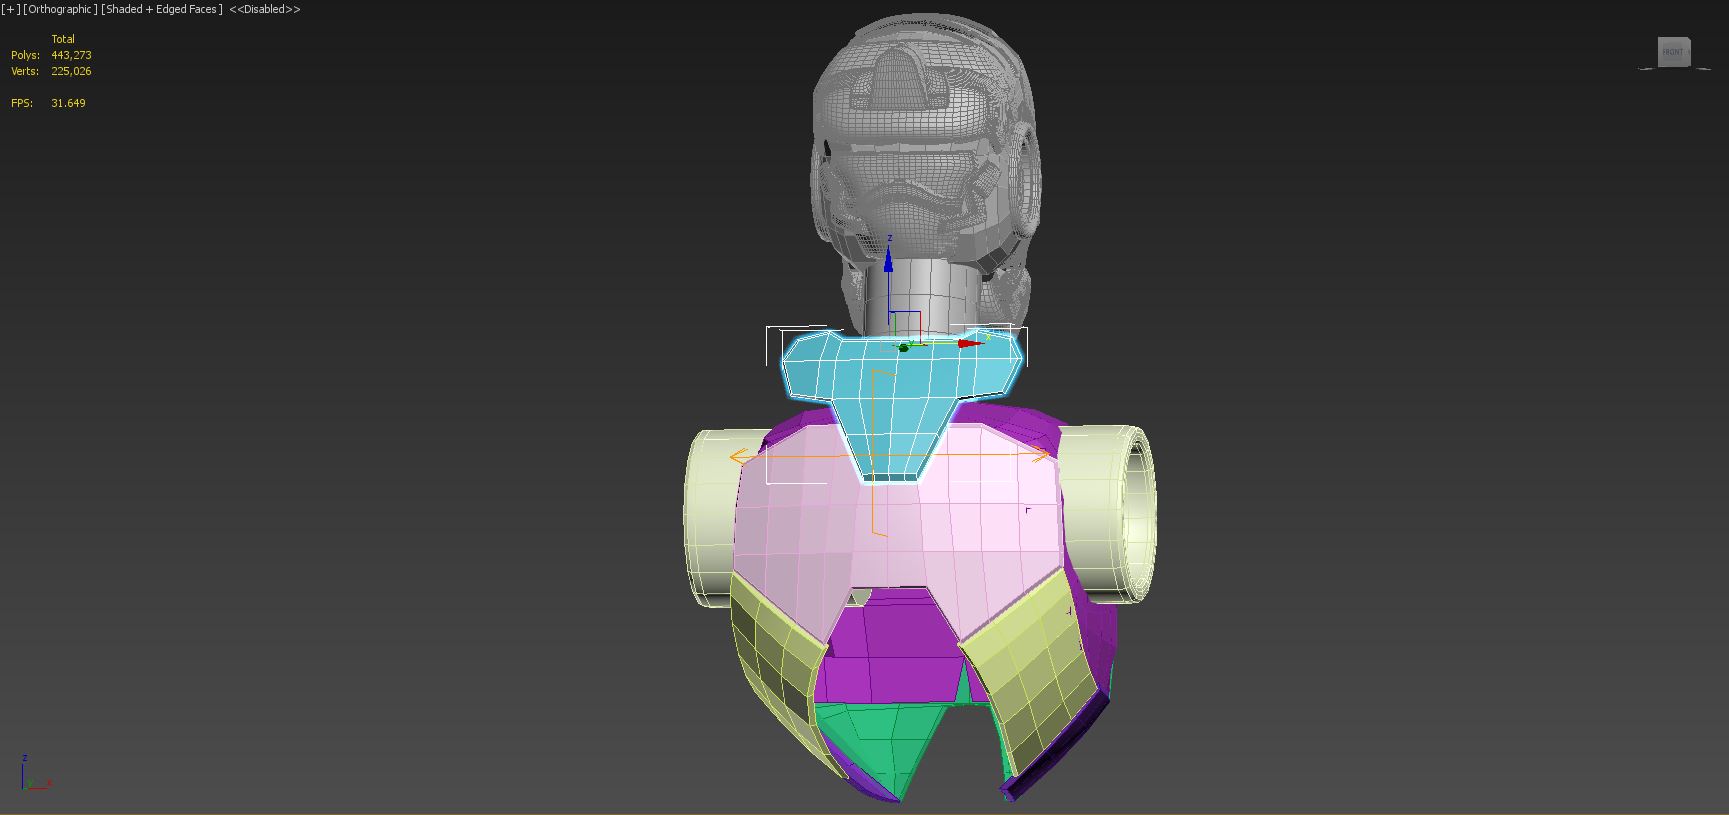
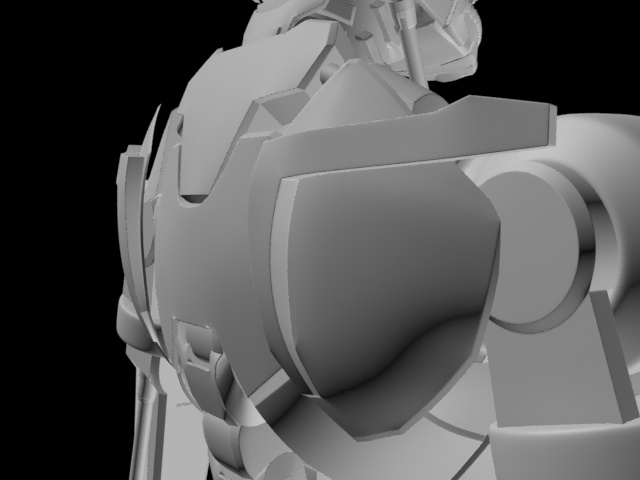
At this stage of production I realise im spending too much time on the head and decided to leave it as it is and start to work on the back/chest of the robot to move things along I also decide I wont turbo smooth anything at this point either just to save time and get the shape and form down first before starting on the finish like I did in unit 6 where I turbo smoothed as I went along to try to keep it within the time I had initially planned. the design is influenced by Zenyetta character from Blizzard entertainments new game Overwatch from my research and open beta that I was playing at the time. still keeping the style of plates influenced from the mech head.
6th Session
finishing modeling parts of the back particularly like the modeling of the shoulder blades inspired by zenyetta. I like how it resembles the shoulder bones in a human skeleton
7th session
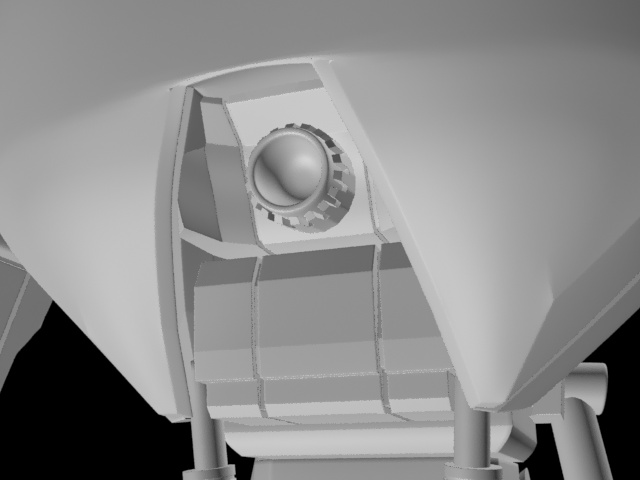
filling out the top chest area my main influence here was the human anatomy and was thinking about what type of bones and muscle groups there are in te chest area for inspiration and adding a spine.
8th Session
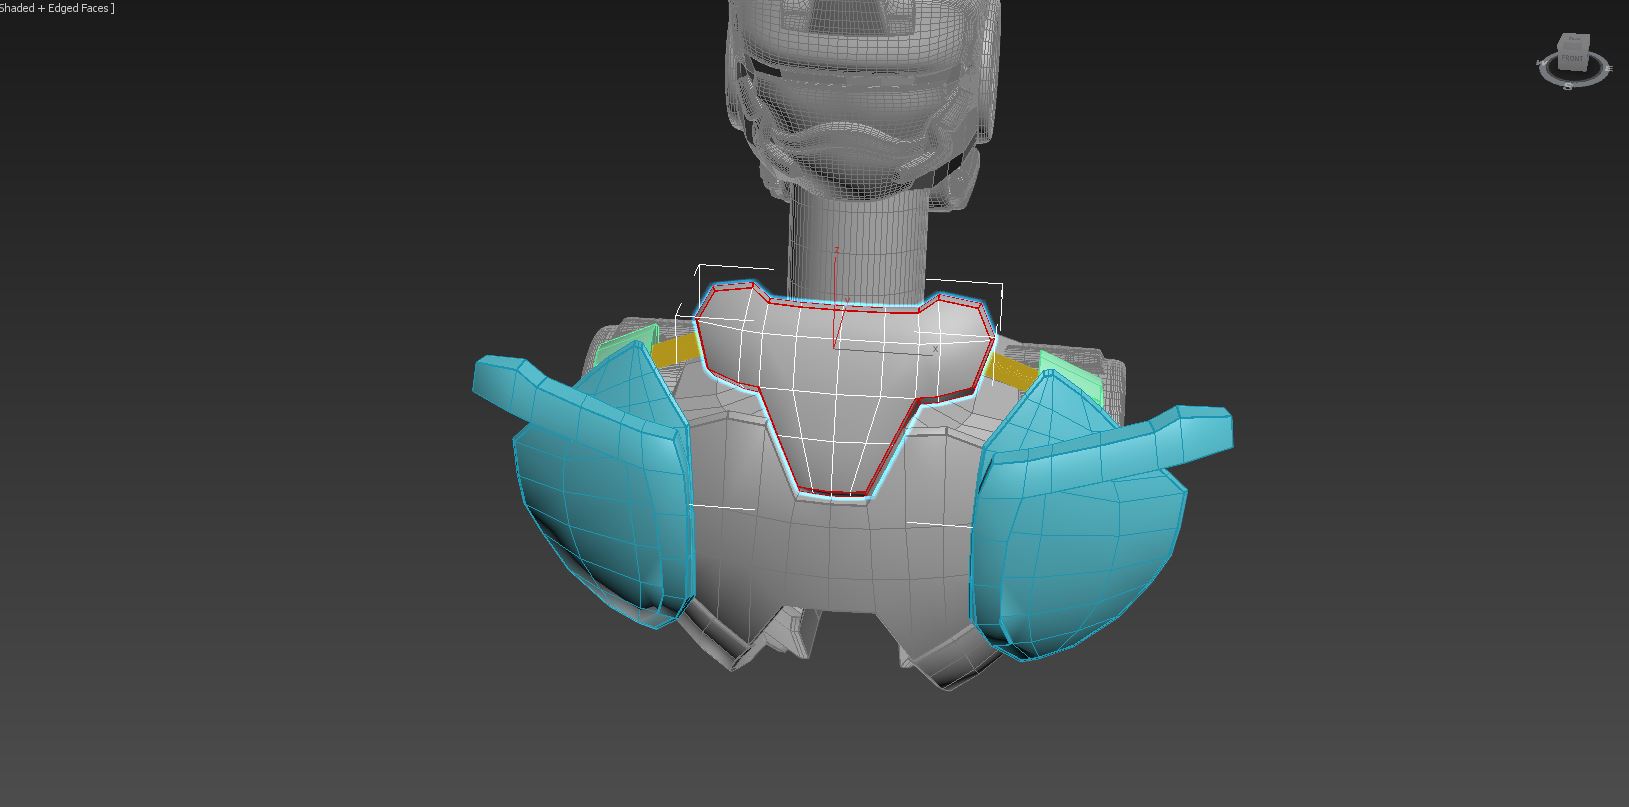
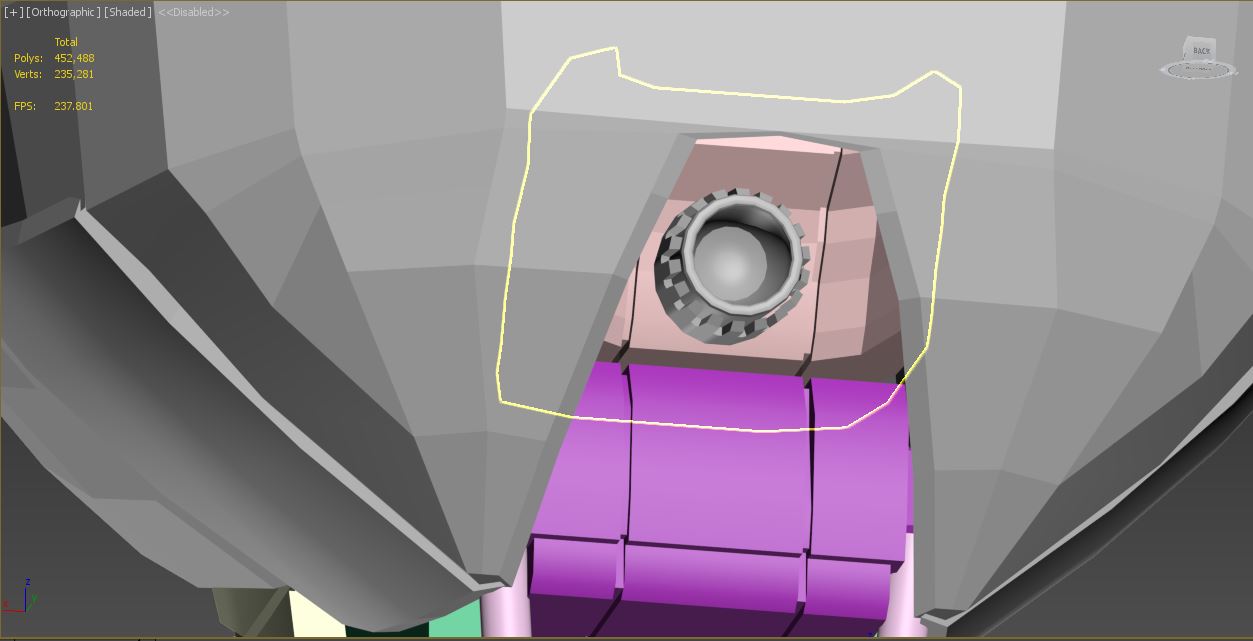
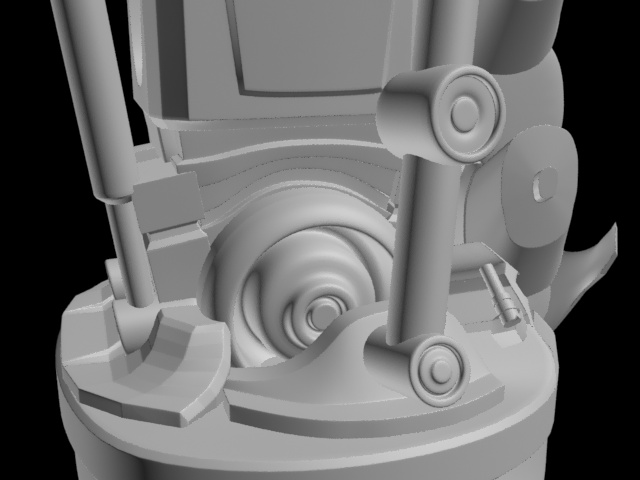
Creating the abdomen area of the robot. when it came to connecting the abdomen to the chest there was quite a large space between the opening in the chest and the abdomen initially I started creating a sort of base for a pivot to connect the abdomen to the chest but I didn’t like it and it was mostly hidden from most angles so I decided to scrap that idea and start again
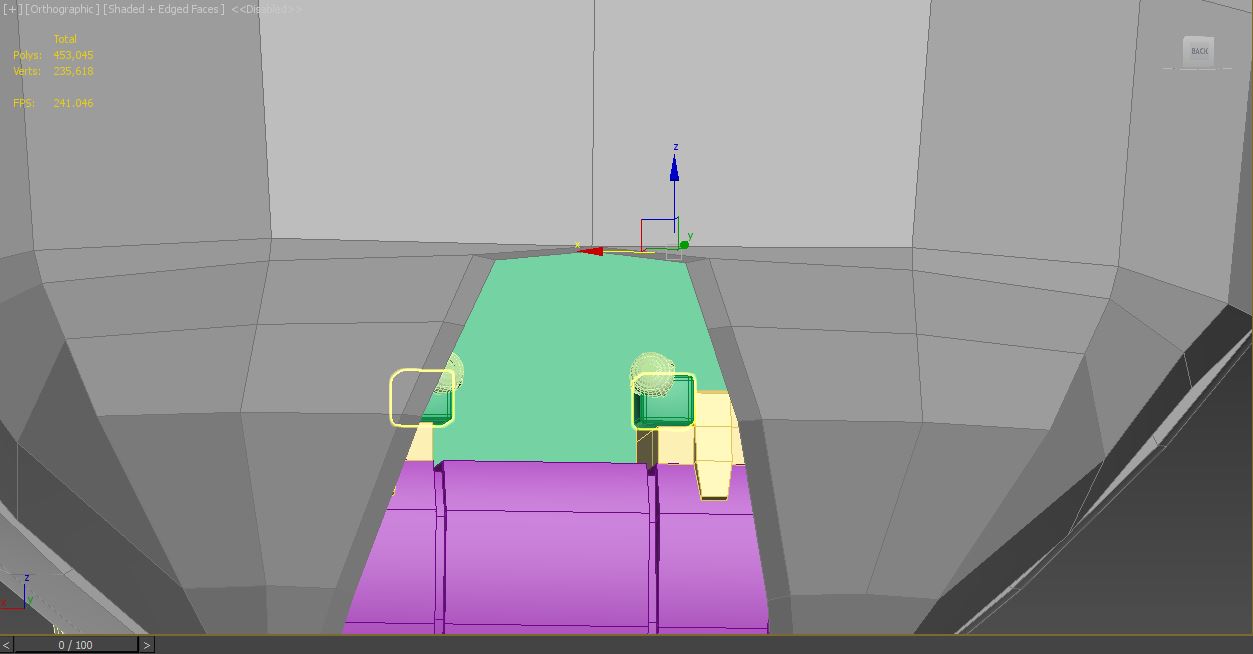
final design. I then decided to put a core like device in there instead this was just copied from the arm socket and placed in the chest opening then created some thing to enclose it and connect it to the chest.
9th session
Creating the arms. initially to create the right arm I had used the symmetry tool but found that when it came time to move the arms trying to lock the geometry in place with an edit poly then detaching it to create 2 separate arms the pivot points became messed up and it moved all my geometry out-of-place so instead I deleted the symmetry and used mirror instead this then allowed me to move my arms out of the way.
10th Session
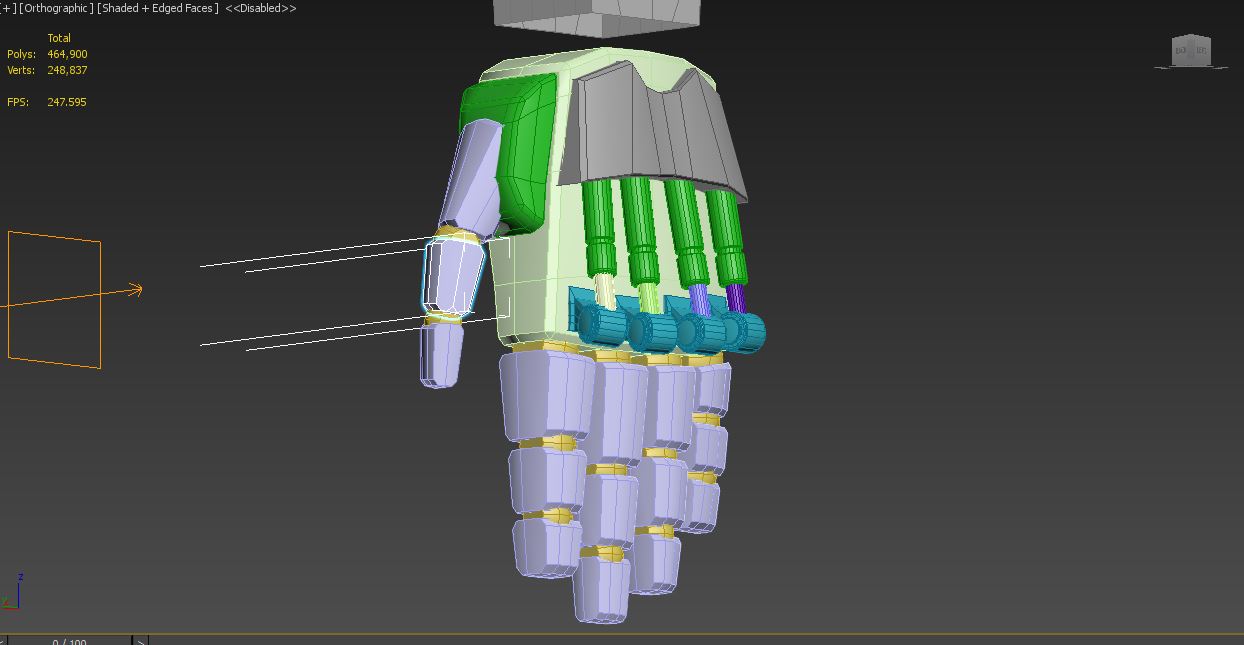
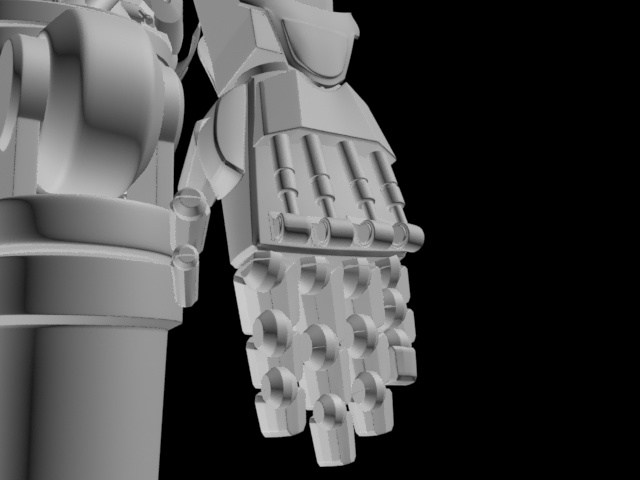
Developing the hands more.
11th Session
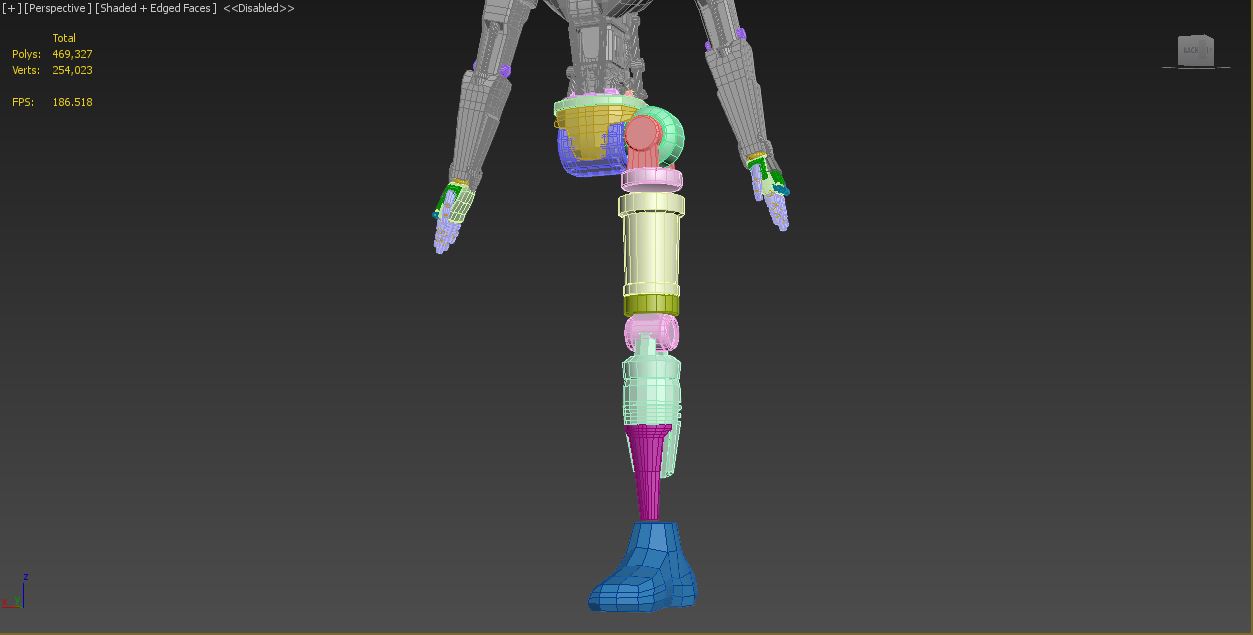
when it came to creating the pelvis I started to look at some more references to get and idea on what direction take.
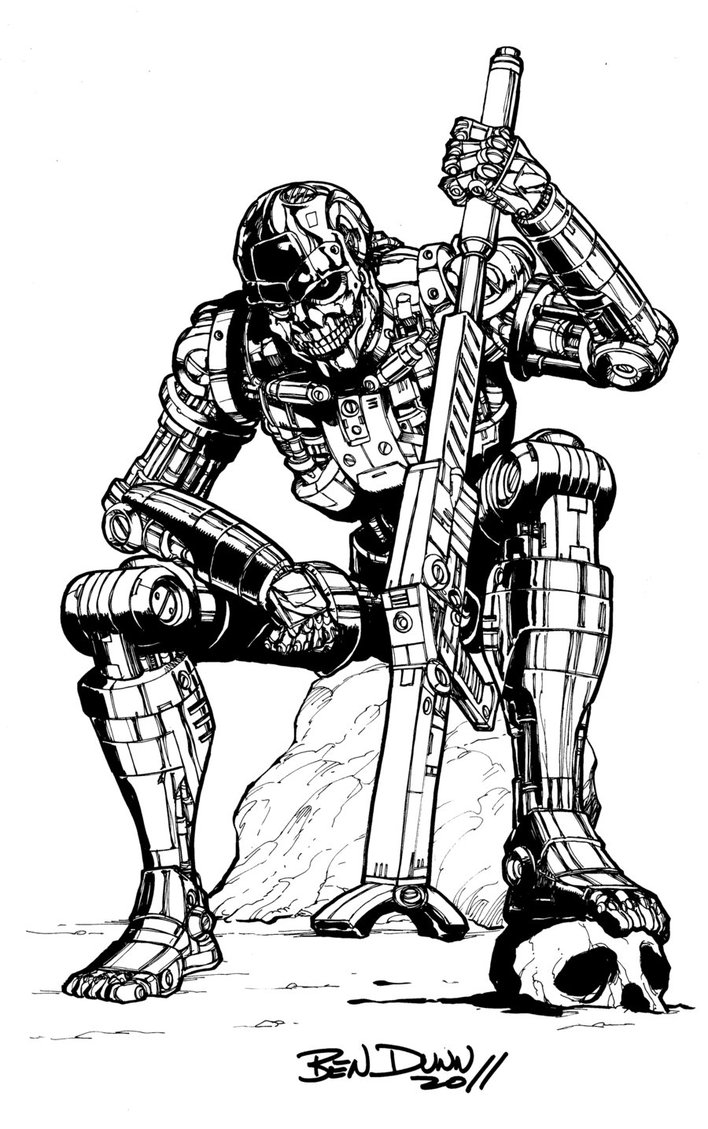
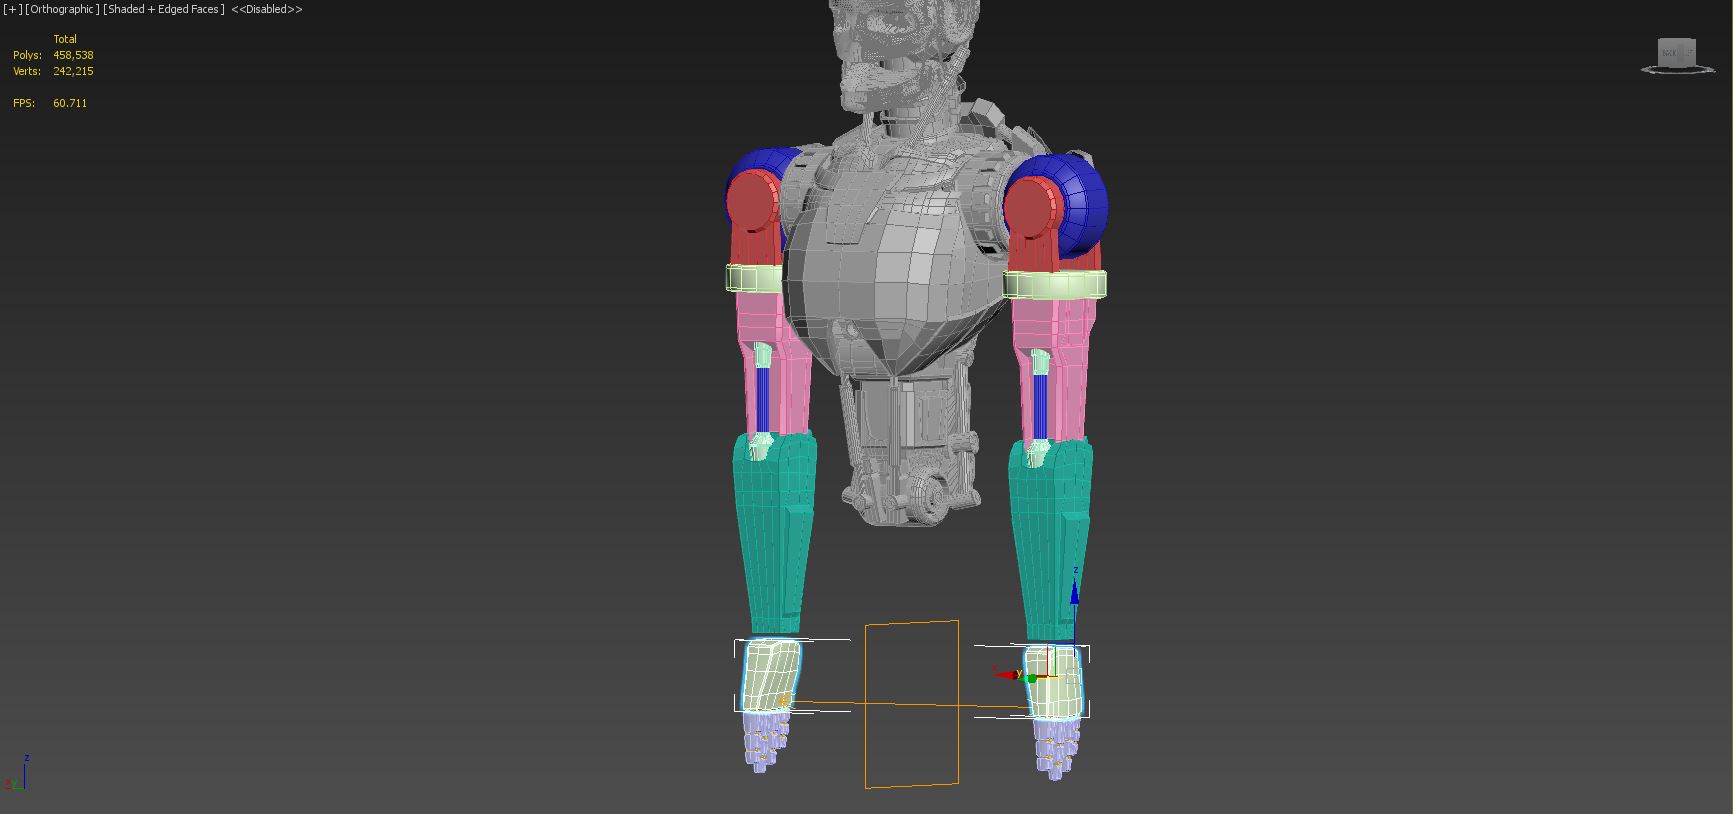
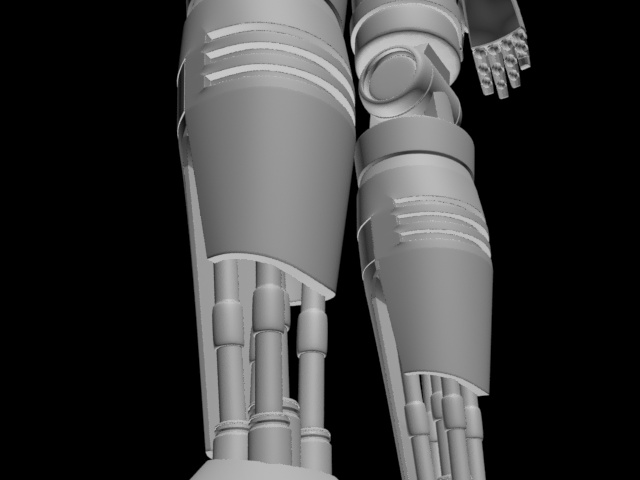
when Creating the legs I took influence from zenyetta and Robot skeleton by Ben Dunn
12th Session
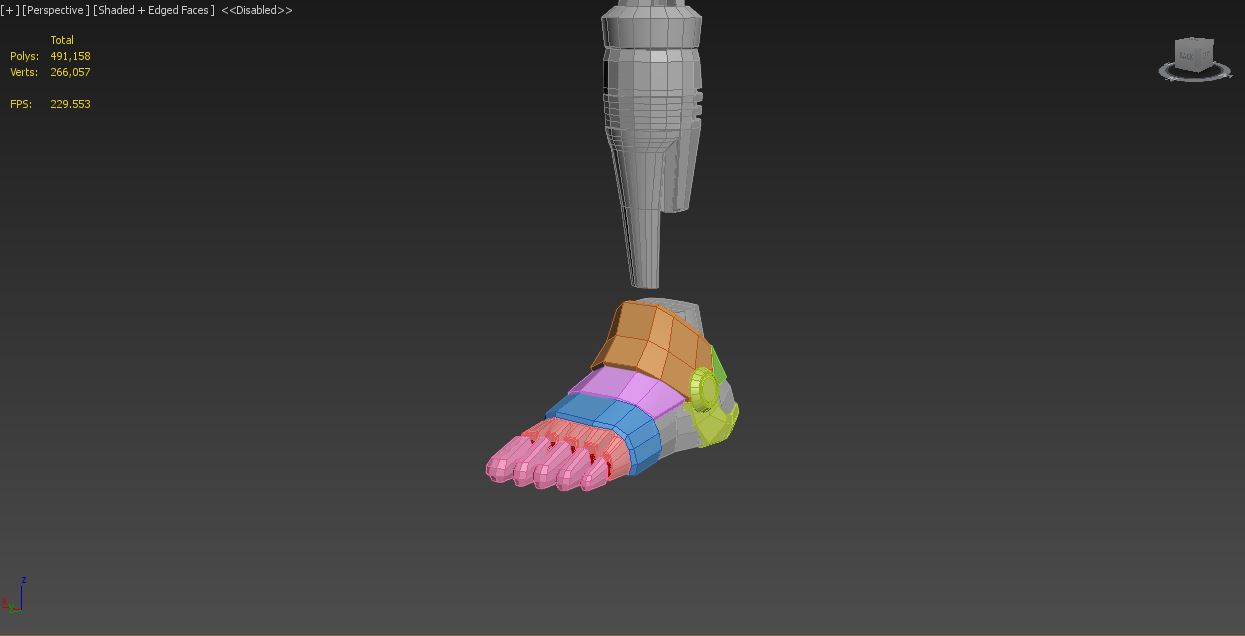

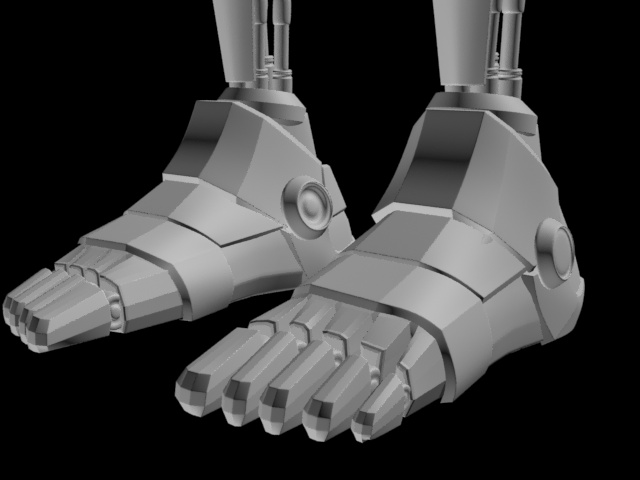
developing the feet taking reference from robot Skeleton by Ben Dunn and Human anatomy
13th Session
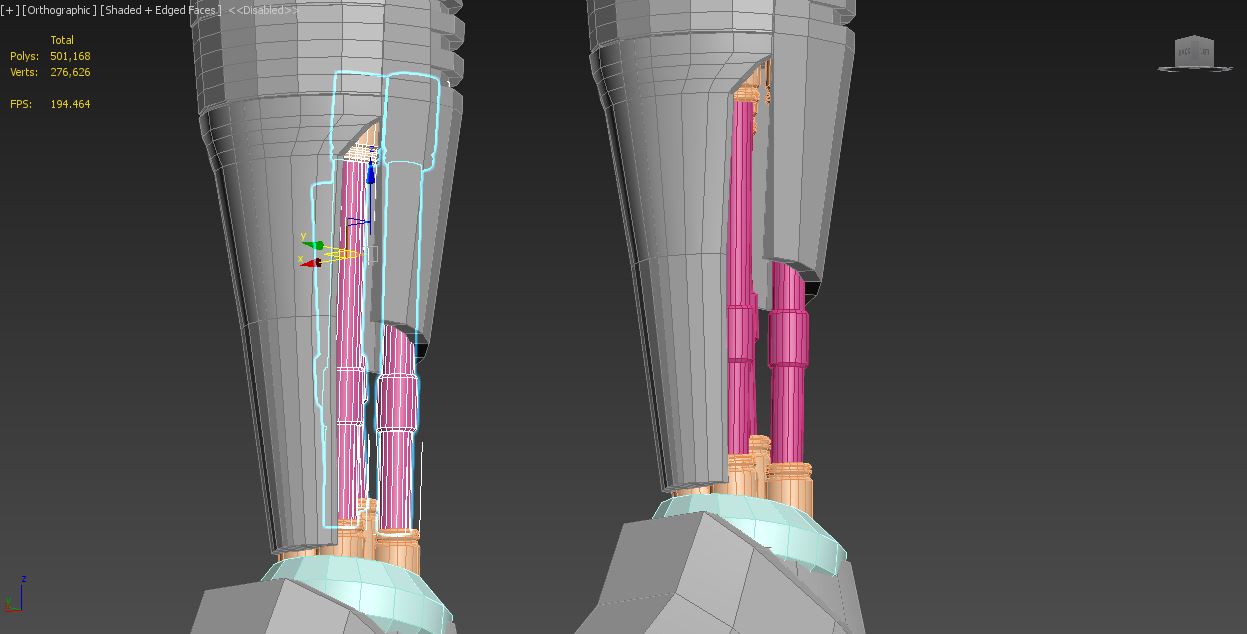
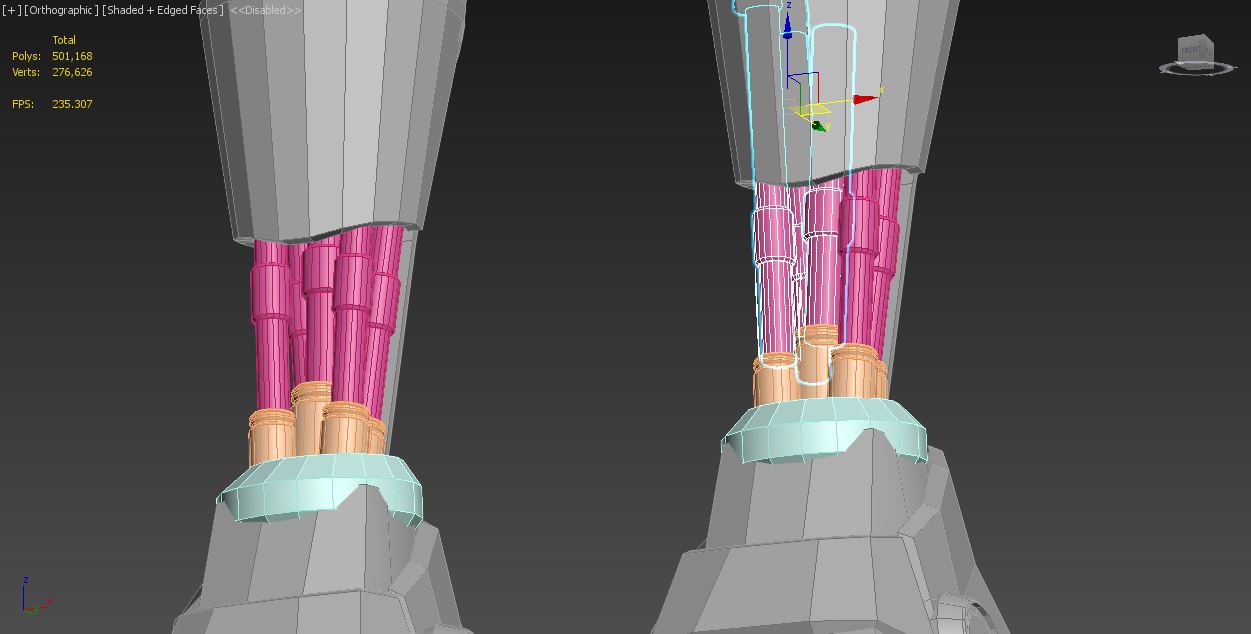
Developing the lower legs.
14th Session

Going back to the head to finish developing it.
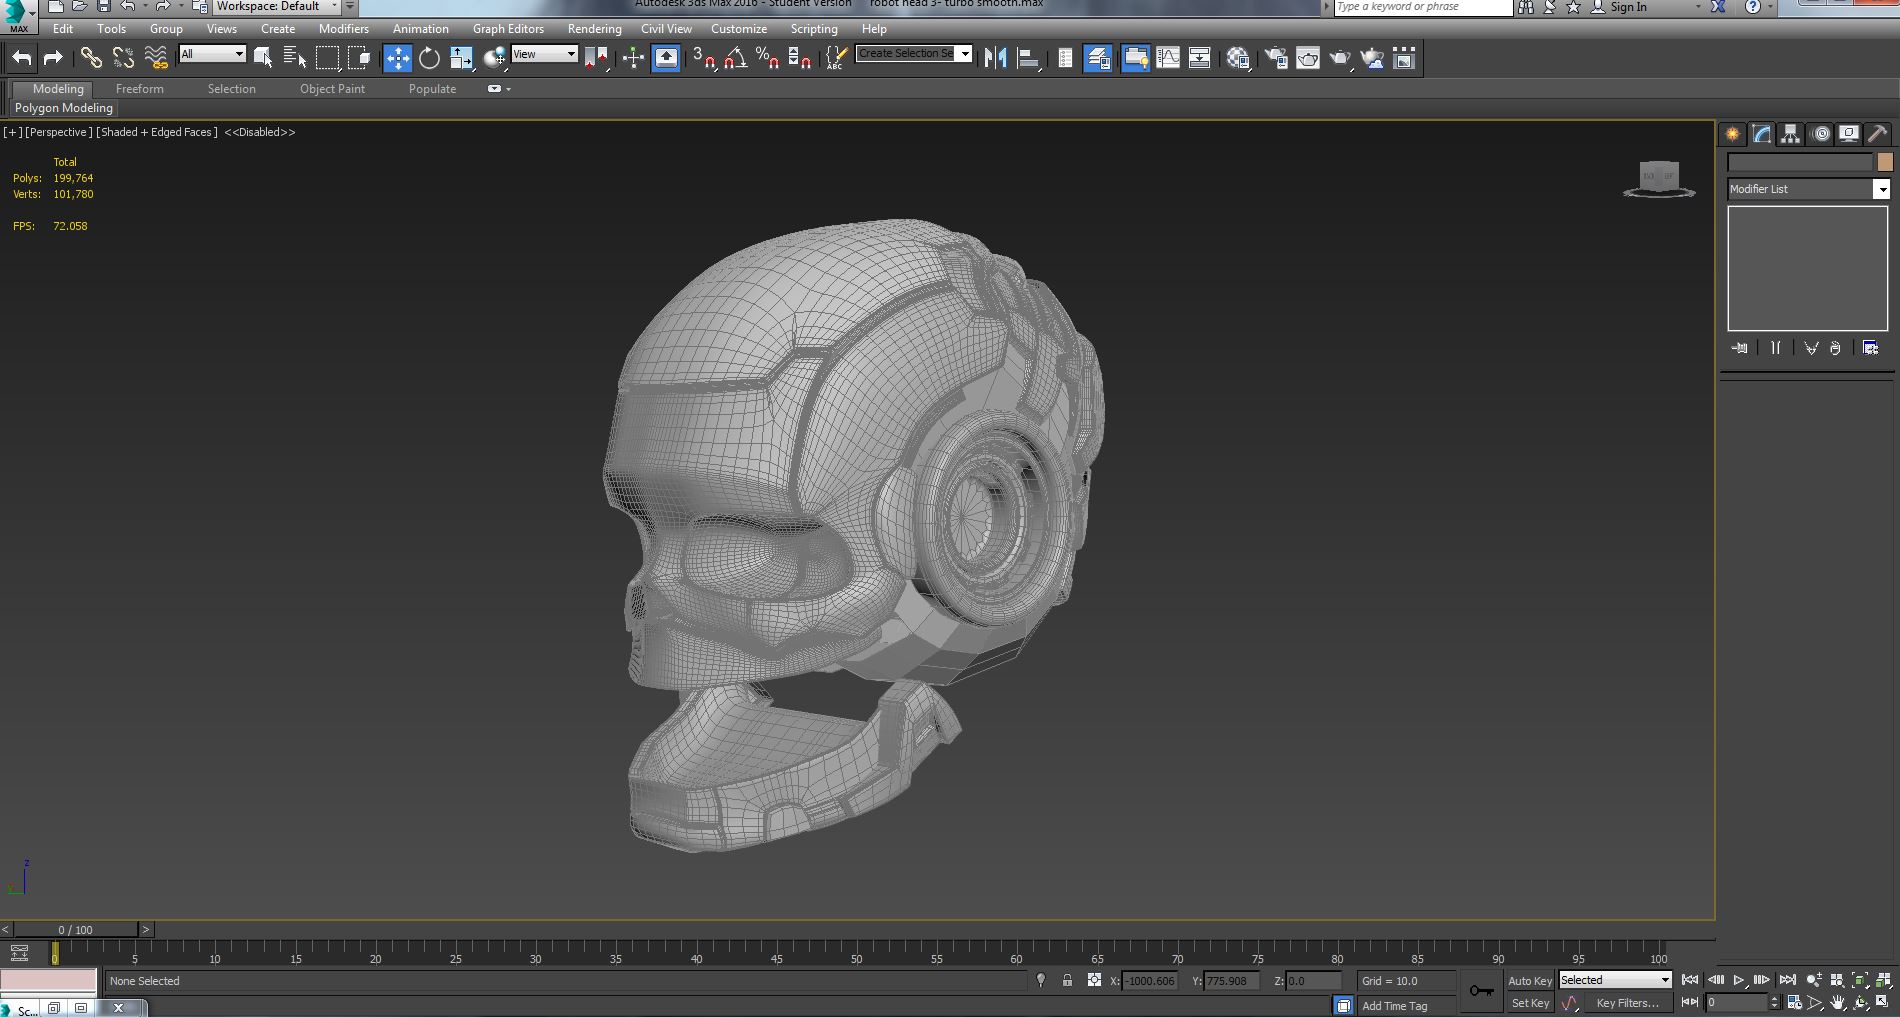
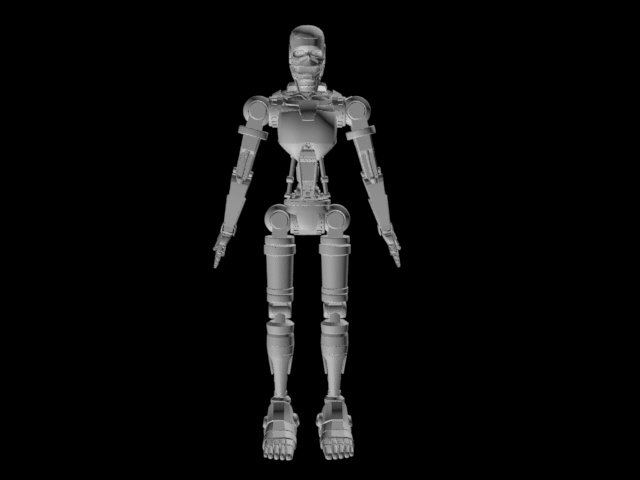
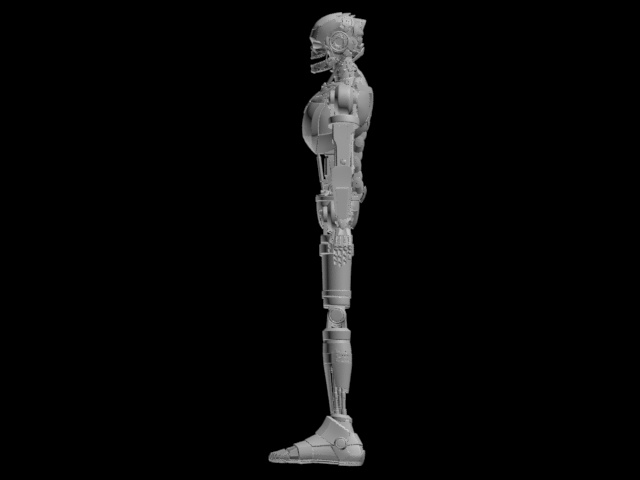
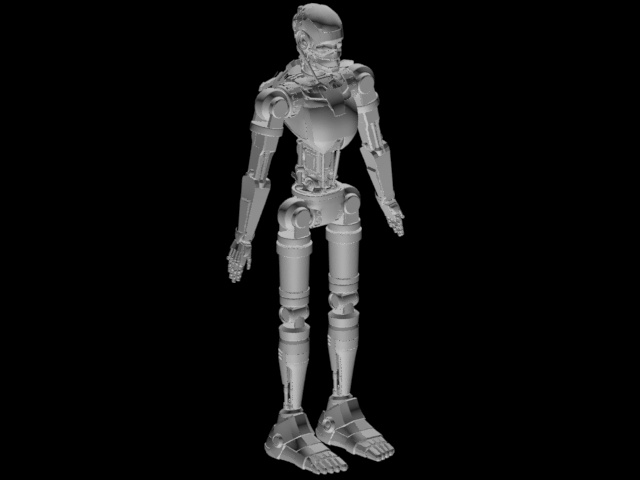
Completed Model
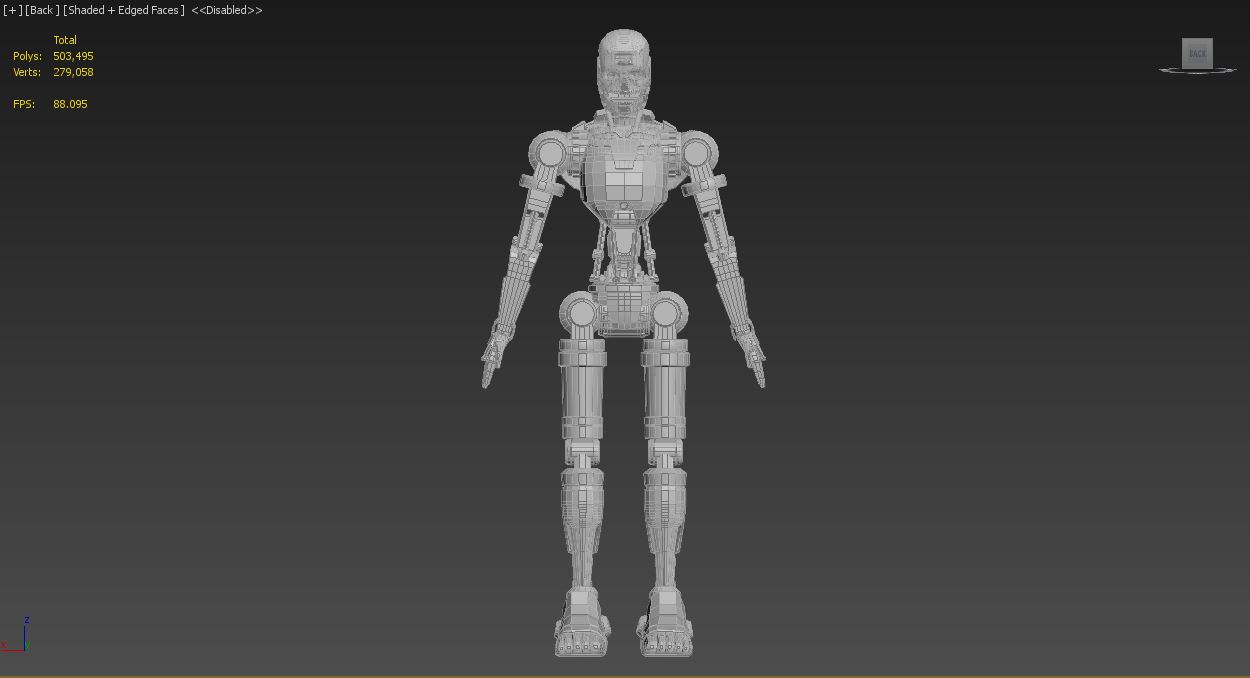
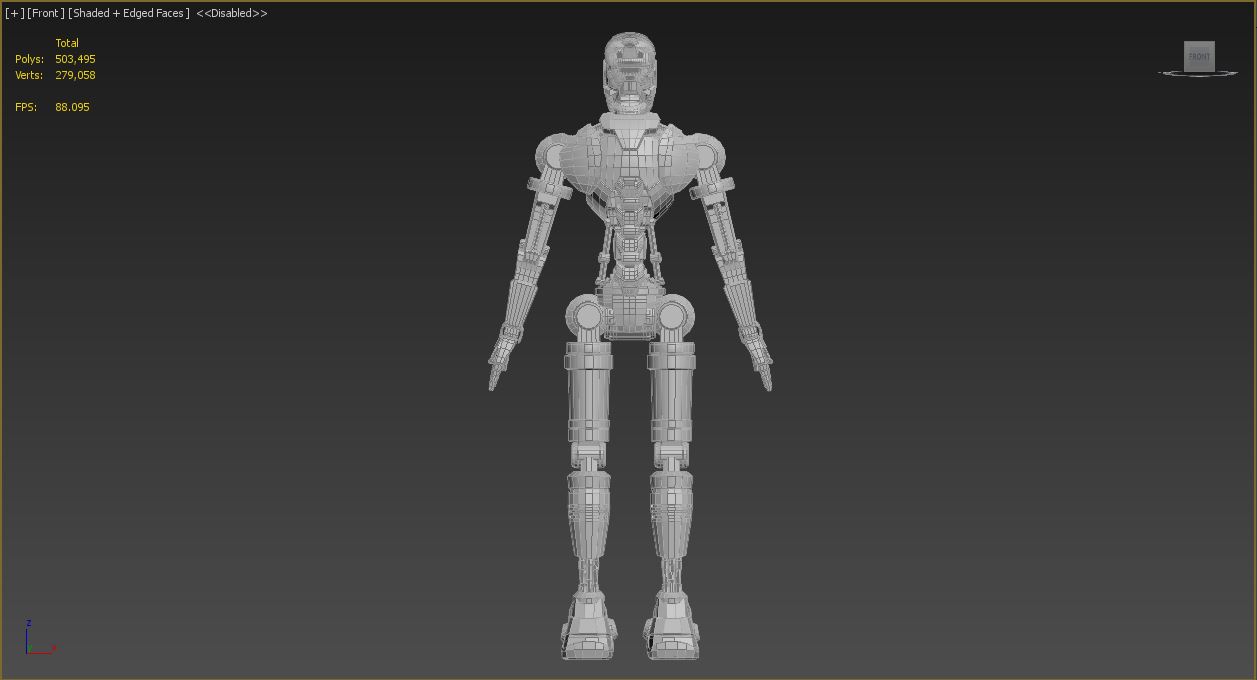
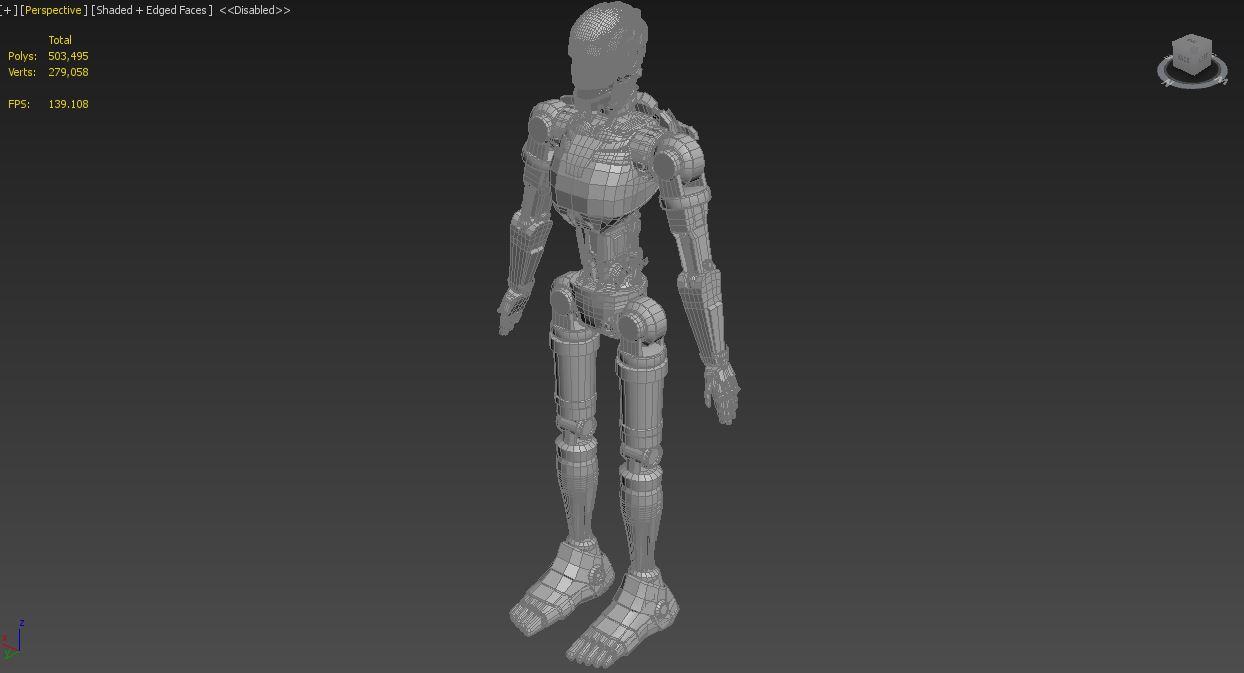
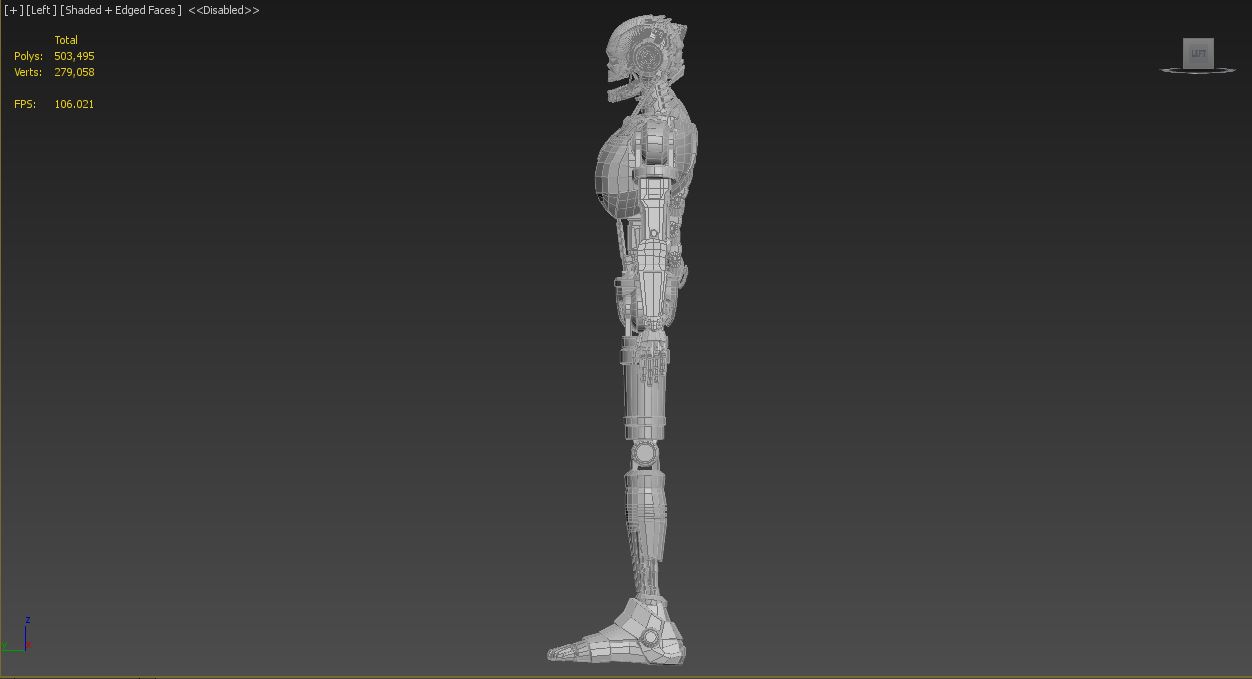
this is the base model completed unturbo smoothed apart from the head is currently at 503,495 polys
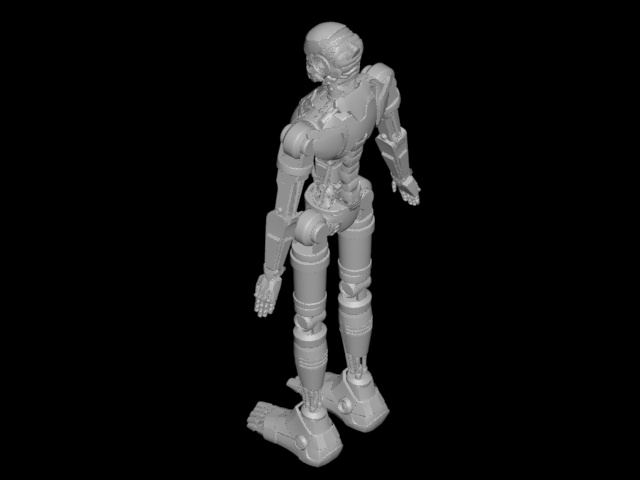
Final model Turbo smooth

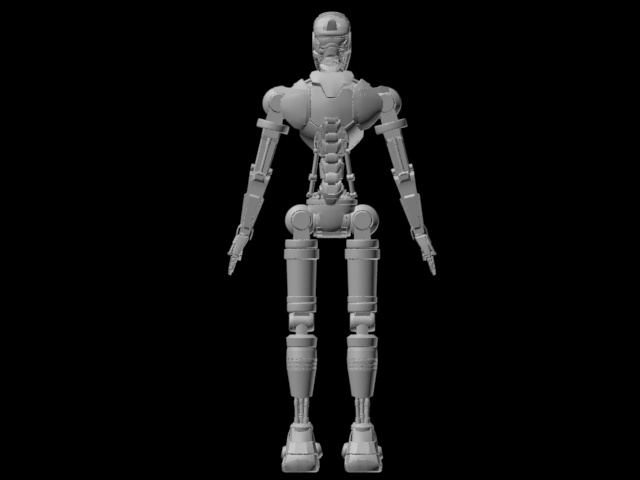
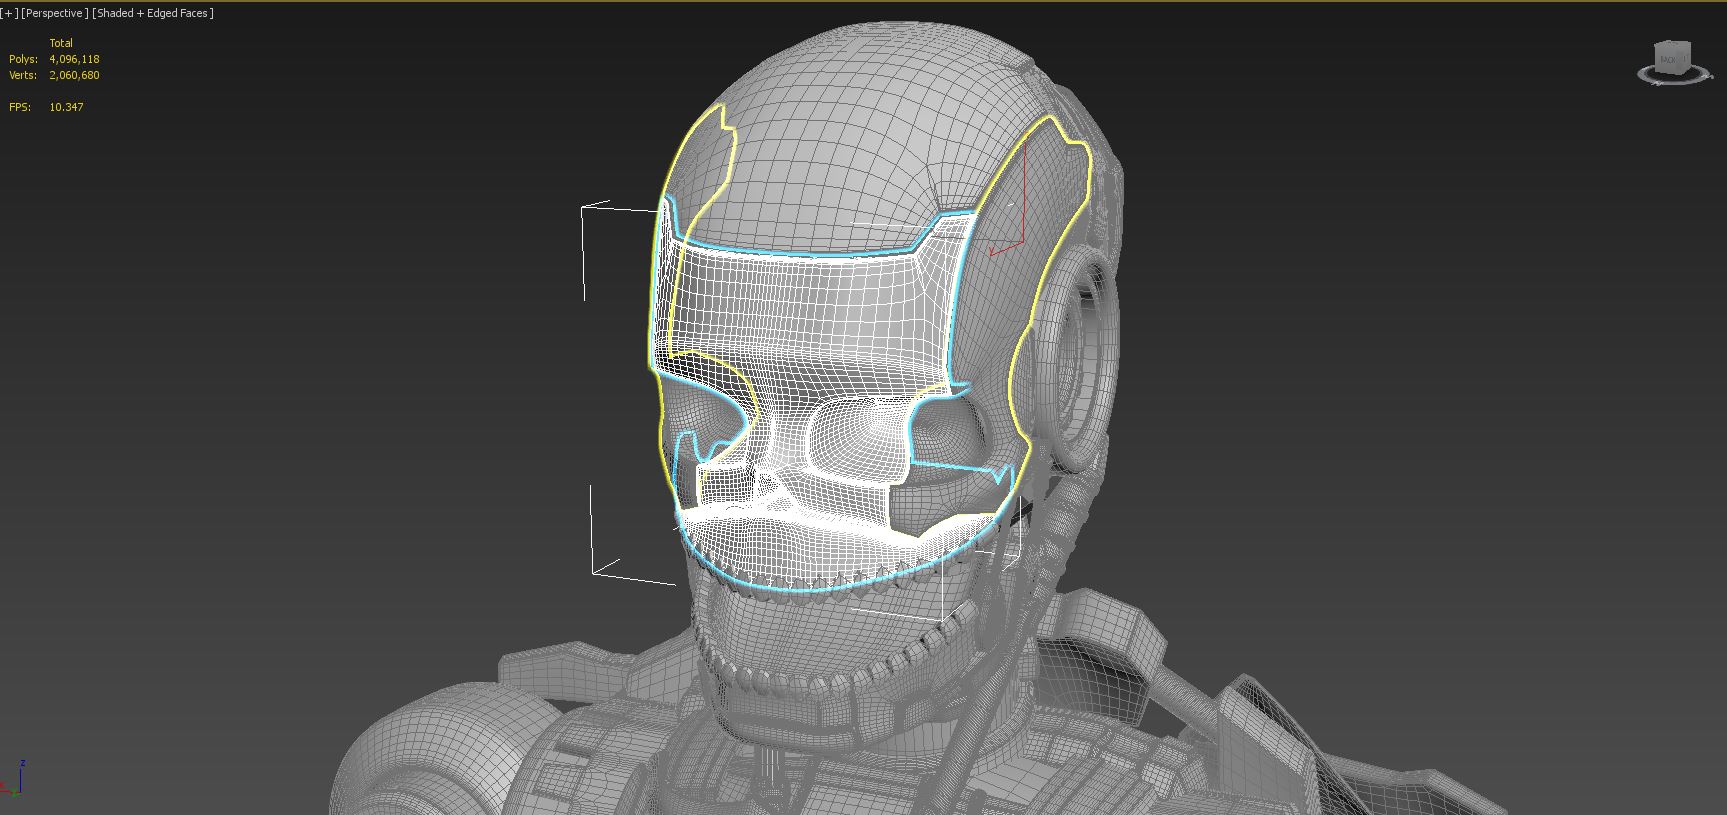 Final model with Turbo smooth 4,096,118 poly count
Evaluation
So far in this stage of production I am quite happy in terms of the quality of work I have produced so far. this robot base model is by far the most ambitious model I have created to date it has turned out better than I had expected even though this is still just technically half of my finnish model it meets my objectives that I was trying to achieve a Human skeleton inspired base model that design style remains quite simple and neutral. I am Happy With the proportions of the model they are quite accurate to the human skeleton but the one are that is out of proportion but is quite subjective is the size of the feet as they do seem a bit to big specifically as the feet meet the ankle as the feet are quite broad and the ankle is quite thin in circumference but then when i think about the model with the armour added the feet wont look out of proportion and will probably work well with the rest of the body’s proportions. My Design Clearly shows its influence from my research specifically from the design similarities I found when trying to achieve the skeletal robot aesthetic. for example Most of the detail and unique features are on the head and chest area, the enlarged chest influenced by the rib cage and the slimmer simple symmetrical limbs. this will serve as a good base for me when I move into the seconds phase and design the chosen theme armour I can use it as reference and inspiration for what I want to do with the model. some concern with the project at this stage is the amount of time It took me to complete this model from my initial time scale I estimated that it would take 2 weeks for me to complete this base model but it ended up taking closer to 3 weeks, my initial plan was not unreasonable it was fully within my capability to have this task completed within that time scale. the reason it was behind schedule was to due to my lack of motivation to start work and carry on a steady progress and work flow. my progress and work flow while making this model was sporadic long burst of work where I would start and work for about 5-7 hours at a time but then not continue to work on the model again till another 2 or 3 days or even longer, as a posed to the more preferable work style and flow of a steady progression of work each day. this is definitely a weakness of mine that affects my ability to get work in on a deadline as i often leave things to the last-minute, I enjoy the process and the type of work but struggle with the initial mind-set need to start working but once I do I work for long periods and I am efficient and productive with my time. this is defiantly something I need to keep in mind as I progress with this unit as it is already effecting it in a negative way as I am currently behind schedule. another worry affecting the time scale with this project is the render time that will be needed for a model with this many polys as have never rendered a model of this scale before as my previous model in Unit 6 – 3D Project was only around 1,000,000 polys but was not animated and in Unit 7 – Time-Based Project my animated scene was about 400,000 polys and had a render time of about 2:40 per frame with about a total of 16 hours render time total. as I have no experience with rendering on this scale im not sure how long it will take to render some thing that I predict might be around 6-8 million polys and be animated with about 100 frames. my initial estimate is that it might take 15-20 mins per frame to render with a 25-33 hour total render time per animated sequence. this is a lot time that I did not predict or account for in my initial plans when it came to rendering and editing of the final shots. Currently im starting to think that this project may be to ambitious for me to complete every thing I wanted to achieve with this project within the given timescale. I don’t think that this idea was initially too ambitious and the production plan I made at the beginning was realistic and achievable but what I didn’t account for and it was made that on the assumption that I would be working at a 80-100% of my total efficiency throughout the entire project but my productivity levels have been around %60. the biggest threat to this project will be my lack of motivation not my technical skill or abilities as I am confident in them.
